Tutorial: Running Windows from inside of Linux

The Idea

How many times have you wished you were able to run some Windows applications? Or how many times have you wished you could run that business app that you were unable to find an alternative for?

Linux offers a great variety of alternative software, but we sometimes cannot find exactly what we need or what we are used to. In some forums, websites, and videos, you will find suggestions to install a Windows application via. The WINE compatibility layer. Great as this tool is, there will always be some apps that will not run correctly or not run at all.

Fret not! There is a solution to everything.

In this topic, we shall install the entire Windows 10 operating system inside Linux!

Virtual Machines

You probably heard of this term before. A Virtual Machine or VM is an application that allows you to install an operating system within your current environment. No reboots, no dual-boot (or multi-boot) setup. In that scenario, you will have two operating systems:

  • The Host OS (in our case, Ubuntu Linux - but it works everywhere)
  • The Guest OS (in our case, Windows 10 Home Edition - but it can be any edition)

The only downside of this approach is that the resources will be shared between your Host and your Guest OS (such as RAM, Drive Space, CPU Cores). So, before you begin this process, make sure you have a system that has enough capacity to run both operating systems simultaneously.

Minimal Configuration

To have a good experience on both your Host and Guest OS, while they are both running, the minimal specs of the system should be the following:

  • A 64-bit capable system (because of 2.5GB RAM limitations on the 32-bit ones)
  • Memory: 8GB of RAM
  • Drive Space: 256GB (SSD highly recommended)

The CPU make, and model does not matter as much, but as always, the better the CPU, the better the performance. However, RAM and drive space are the two vital components.

The Preparation Process

For this to work, we will download VMWare’s Workstation Player, which is free. There is also Oracle’s Virtual Box, but I have found out that VMWare is much more powerful and fast. However, it does require a few more steps than its Oracle counterpart.

Step 1 - Download VMWare Player

VMWare Player is only available for Linux and Windows, and you can find it here:

The image should look like this. Go ahead and download it.

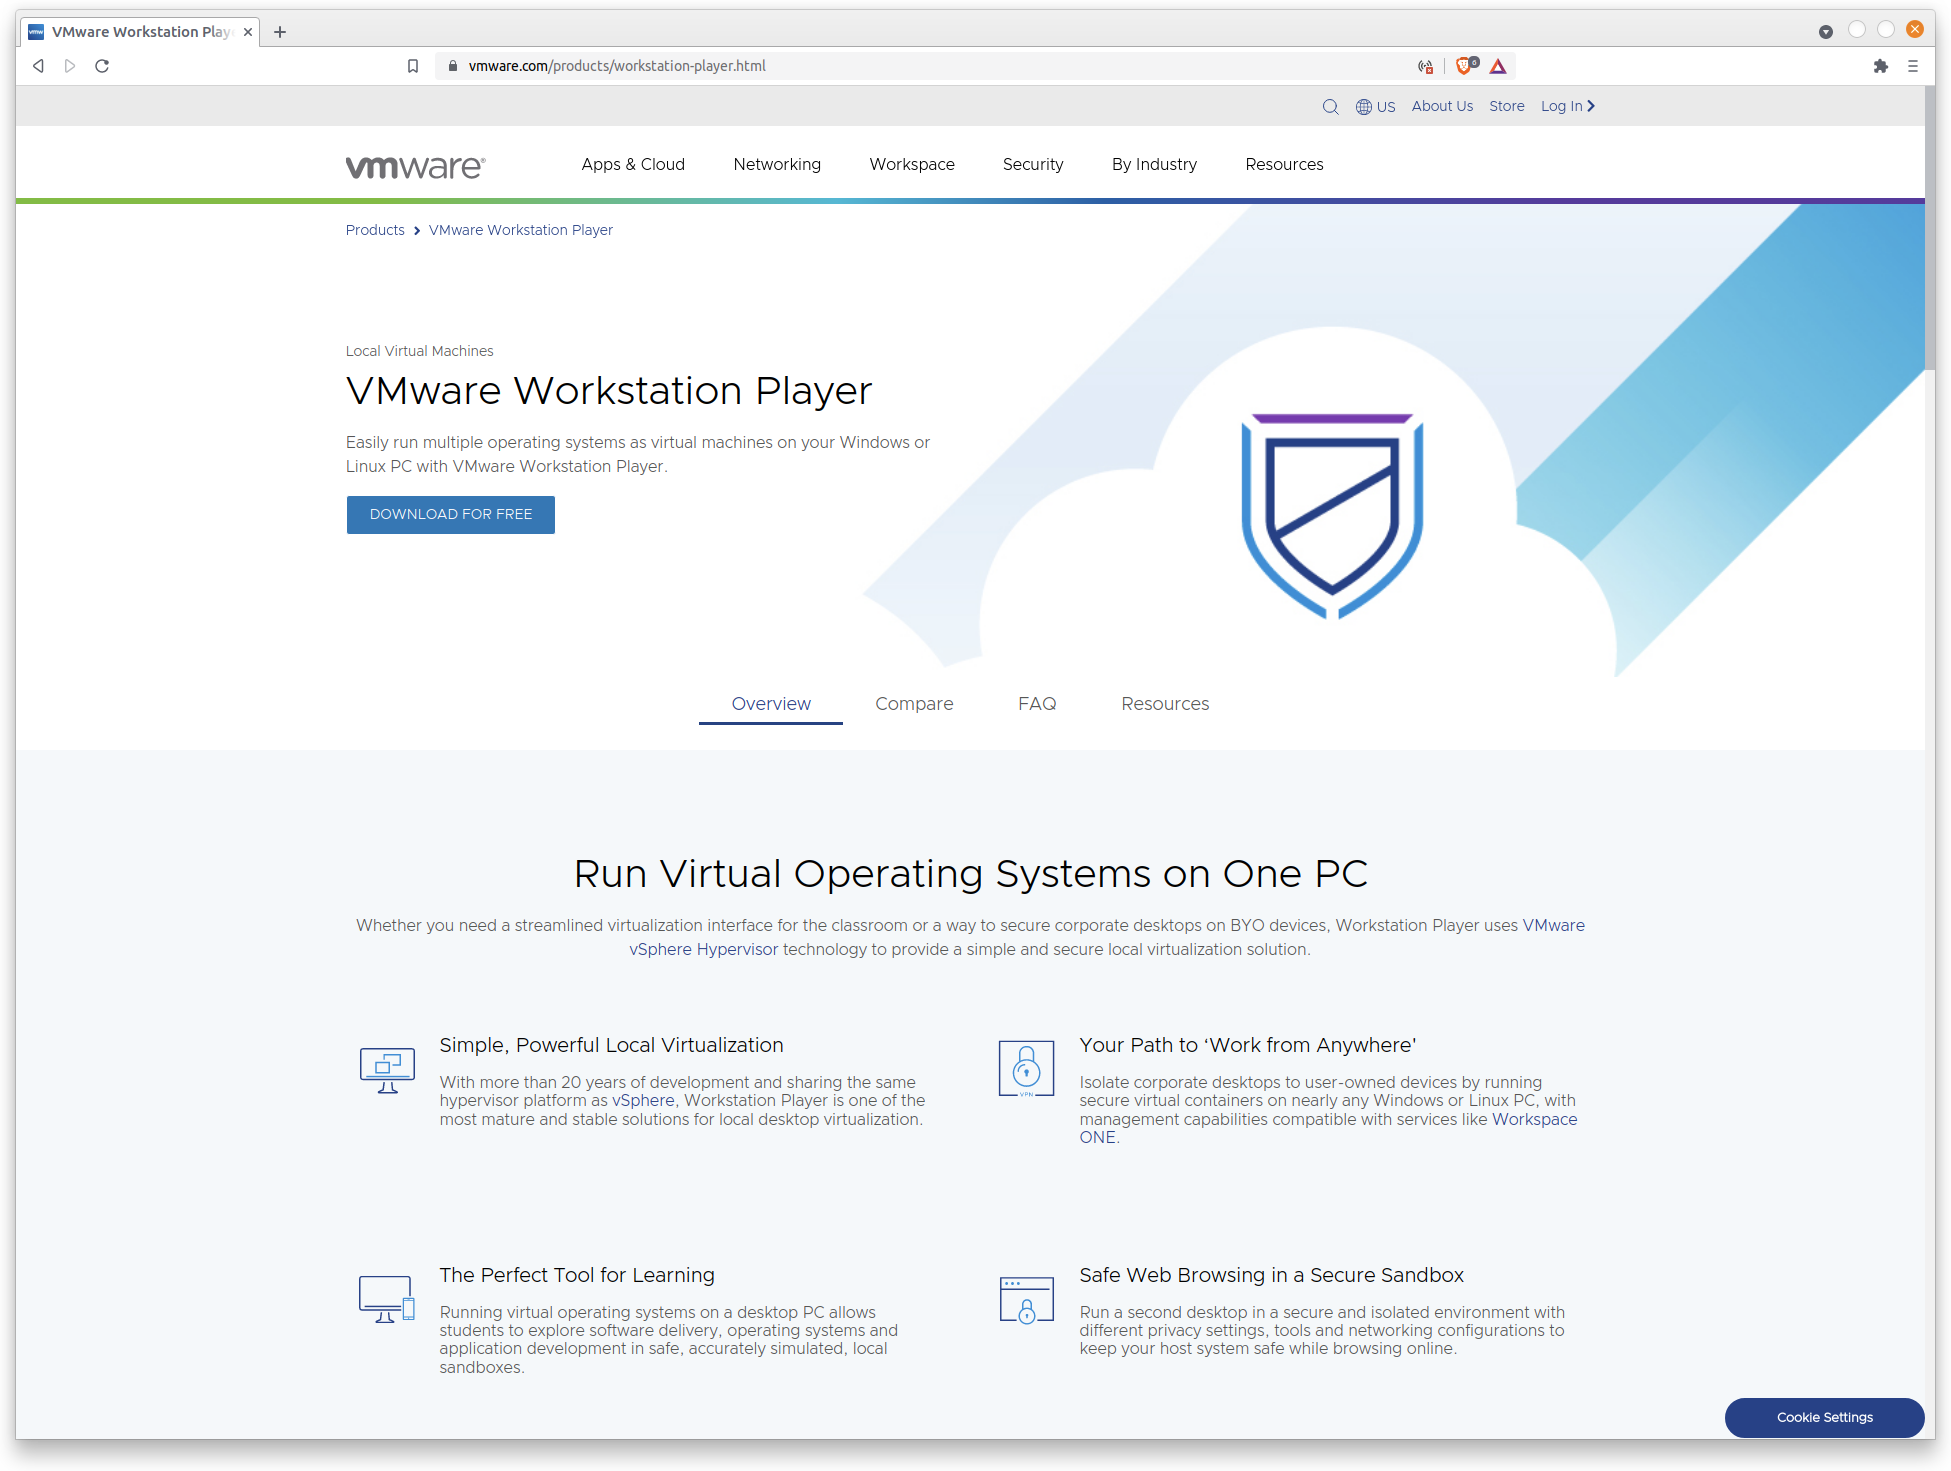
You will need to select the Linux version (2nd one).

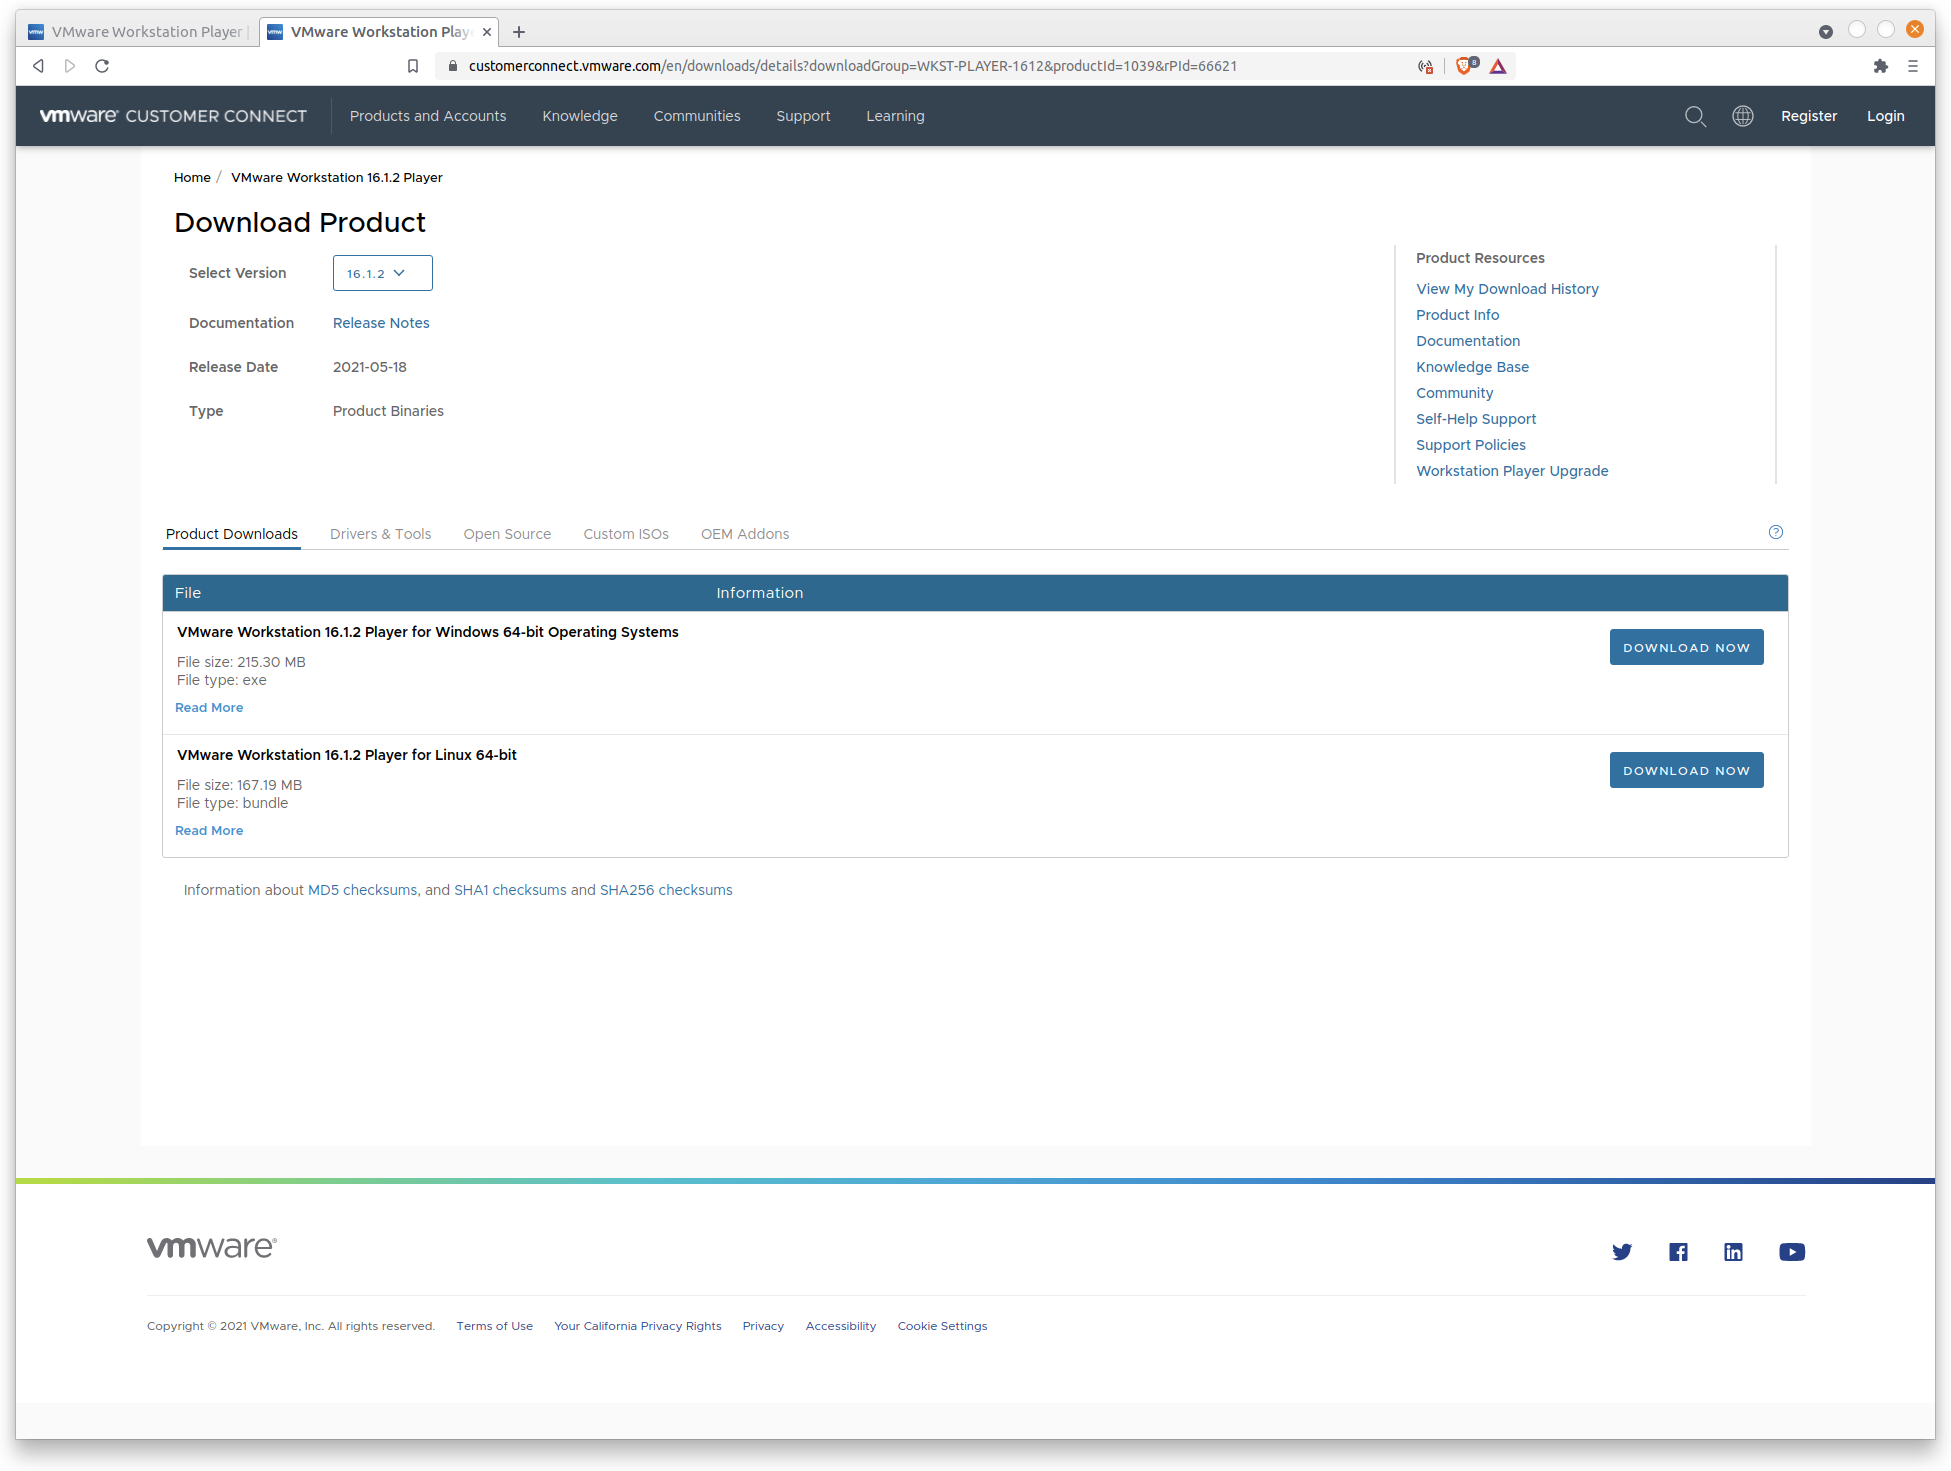
Step 2 - Install VMWare Player

Once your download is complete, open up a terminal, navigate to your Downloads folder, and make the downloaded file executable. Once done, you run it.

The terminal commands are as follows:

cd Downloads
chmod +x ./VMware-Player-16.1.2-17966106.x86_64.bundle
sudo ./VMware-Player-16.1.2-17966106.x86_64.bundle

Please note that the file version may differ when you download it, so make sure you type in the correct file. If you’re in doubt, type in VMWare-Player and press the TAB key to autofill the remainder of the filename.

Once you execute the last command, the installation process will begin:

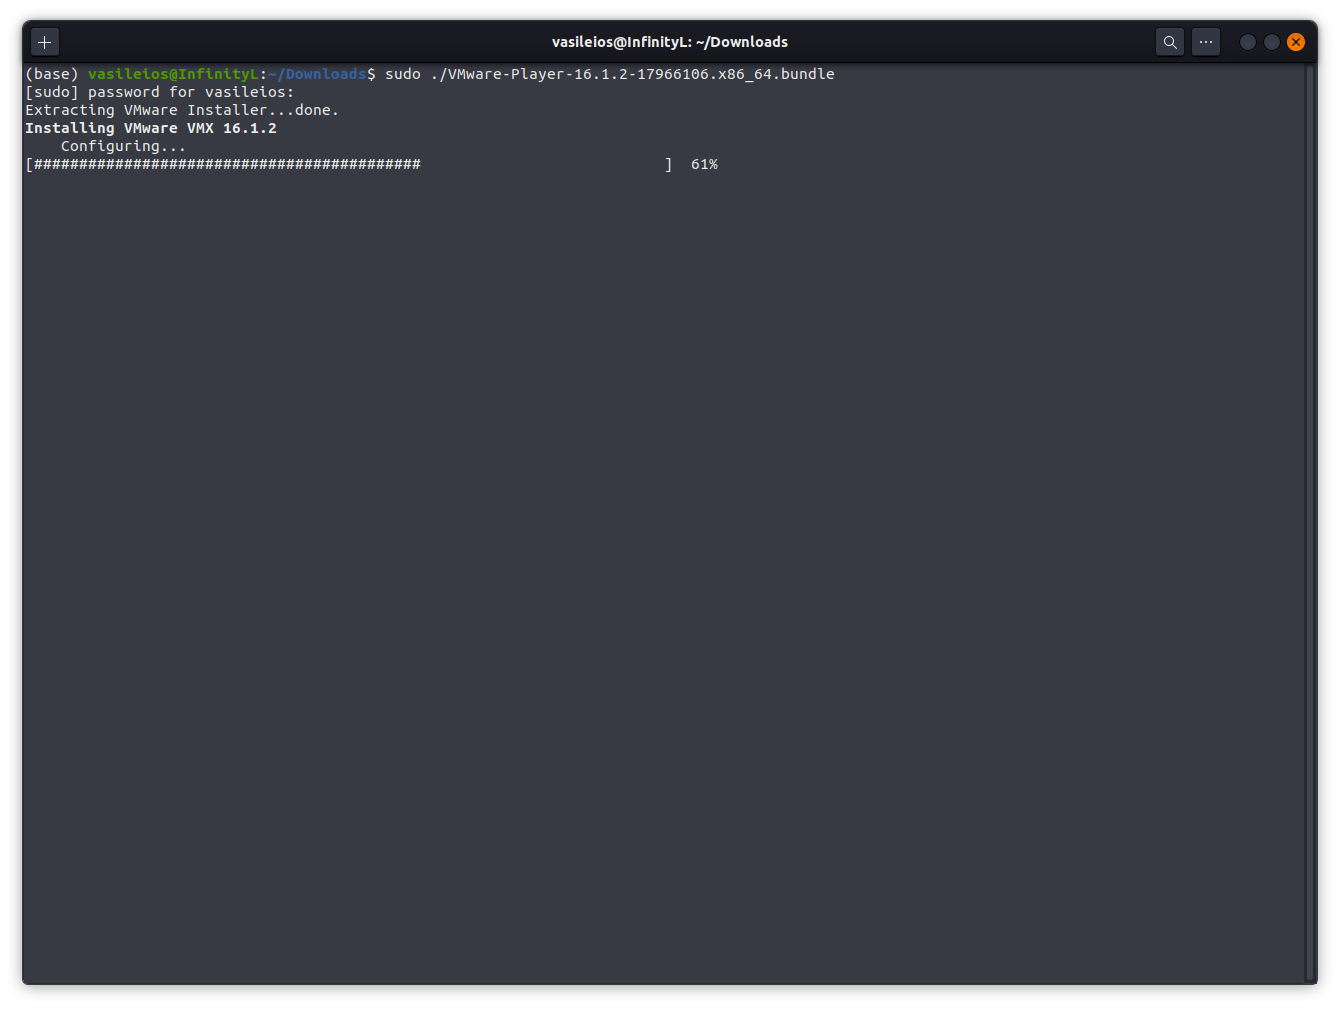
Once it’s complete, congratulations! You now have the VMware Workstation Player installed. If you are on Gnome (Ubuntu), the program will now display normally.

On Linux Mint, it will display on the Start Menu.

Step 3 - Download the Windows 10 ISO File

The process here is simple. Go to:
https://www.microsoft.com/en-us/software-download/windows10ISO
Select the Windows download option (64-bit) and allow the 5+ GB file to download.

Installing Windows 10 inside Linux

This is where the fun (and the irony) begins!
Once you run VMware Player, you will be greeted with the following window.

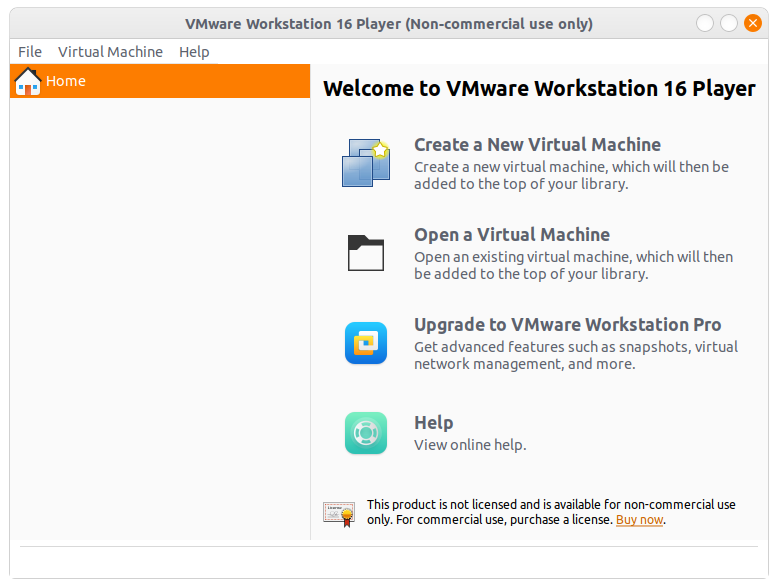
Select to Create a New Virtual Machine, and it’s time to go through the options.
Make sure you select to install via an ISO image and browse to select the location of where you previously downloaded the Windows 10 ISO file (normally, inside your Downloads folder).

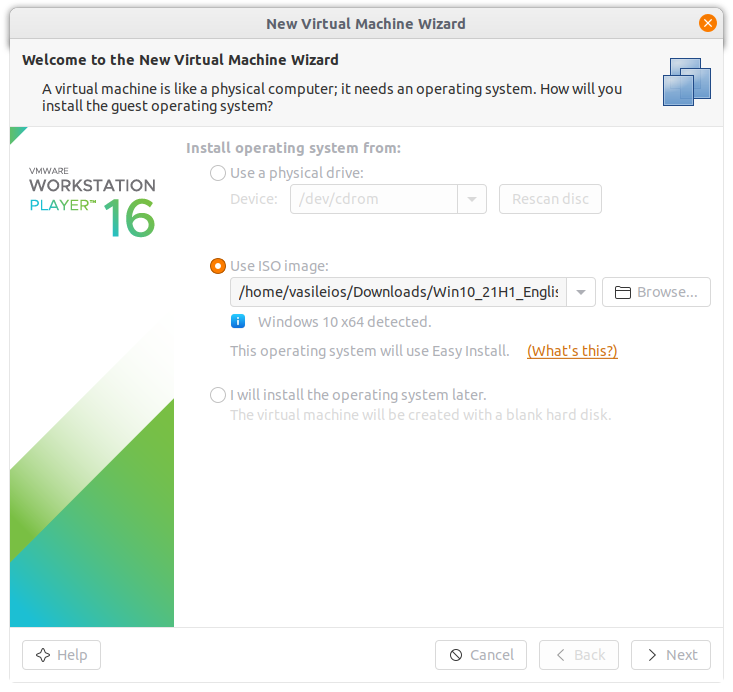
Once you select it, VMware will detect the OS inside the ISO file.

In the following window, you will be presented with how much drive space you will allow Windows 10 to operate in. Keep in mind that the space will be dynamically allocated as the Windows file system grows, and you can always increase it later, should the need arise.

When you proceed to the next step, you will be prompted to configure the hardware and the resources you wish to allocate to your new Guest OS (Windows 10). This is where RAM comes in handy. I would recommend anything between 4096MB (for 8GB systems) to 8192MB (for 16+GB systems).

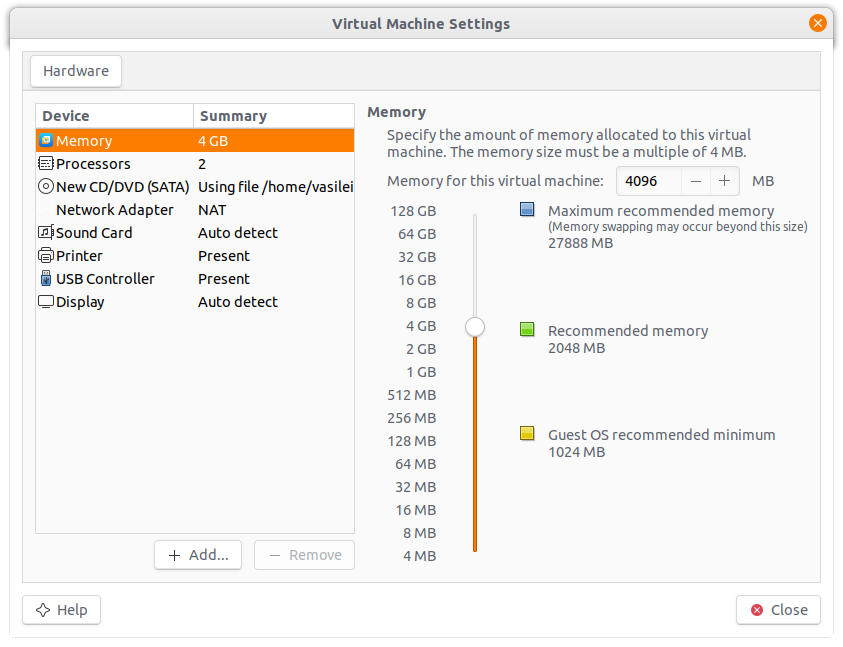
The display at the bottom of the above window will also allow you to dedicate video memory to your Windows 10. However, this memory will be shared between your Linux and your Windows systems, so you can select as much as you like (limited only by the memory of your graphics card).

Note: To activate 3D acceleration, which will dramatically improve your Windows OS inside Linux, you will need to install the VMware Tools. This is automatically installed (via a prompt, which you can select to install when the Windows installation process begins - next image) on your Linux system. Then there is a separate process to install it inside the Windows OS, which we will cover further down.

VMWare Step 11

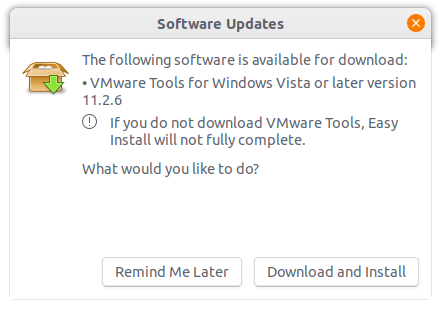
Download and install the VMware Tools.

The Windows Installation Process

Most of you are aware of this process. However, it’s actually refreshing to see it being installed behind the security of your Linux OS.

Note: Once you run a VPN service on your Linux, Windows will only access the network behind that VPN service. So, you will not need to activate anything on Windows.

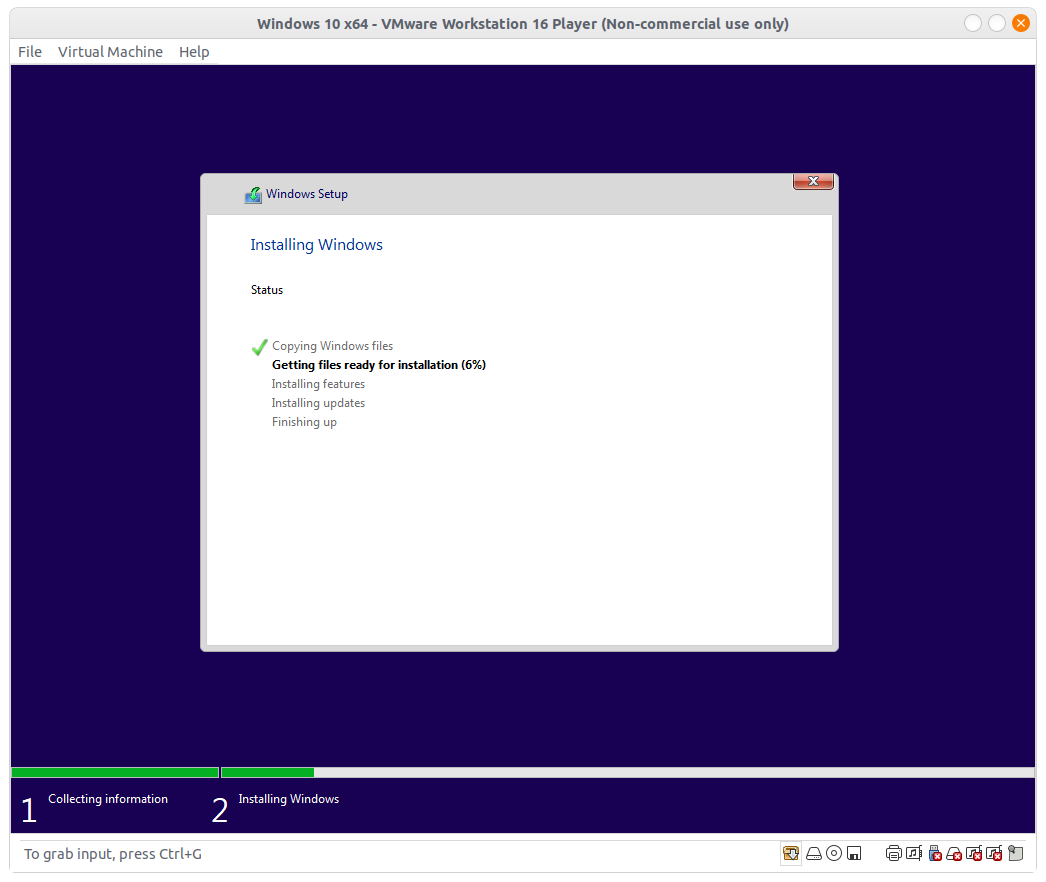
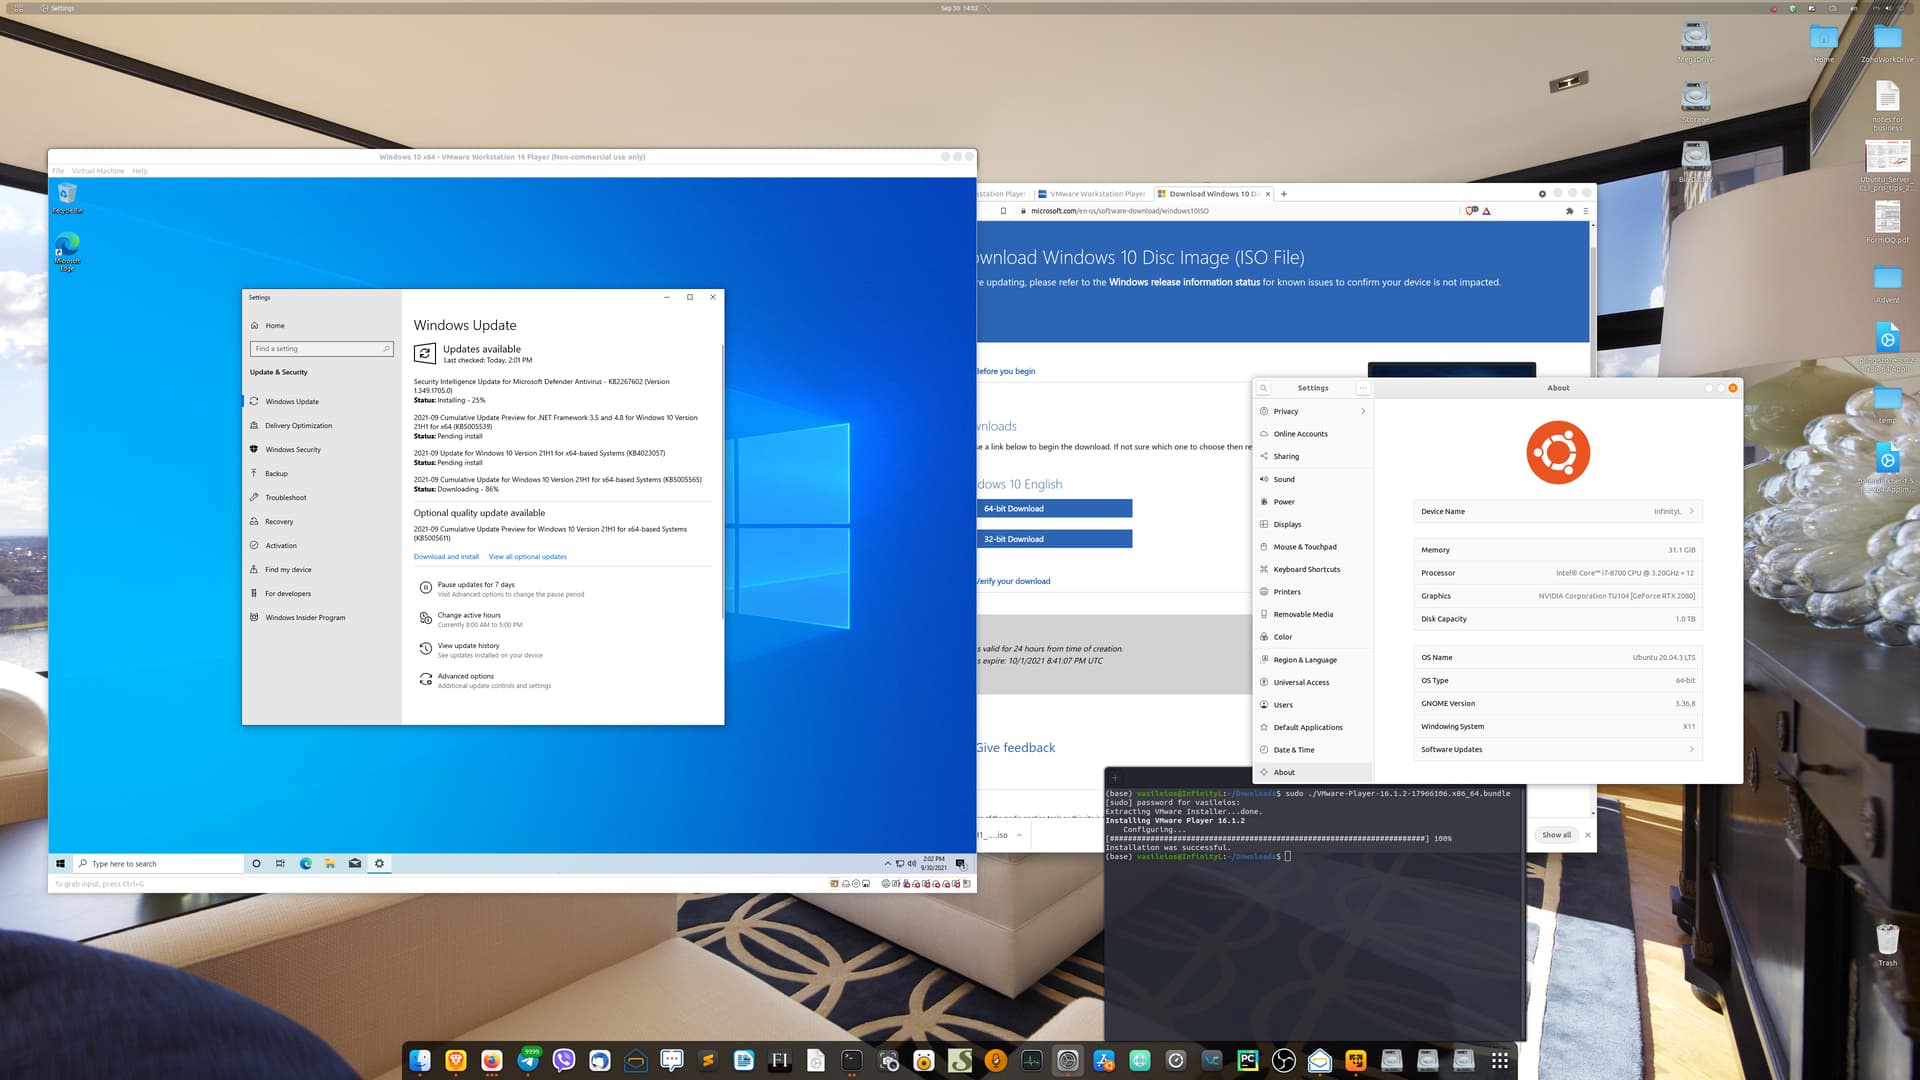
Once the process completes, congratulations! You now have Windows 10 installed inside of Linux!

Installing the VMware Tools

This is not a required service, but it will allow you to utilize your hardware’s potential fully (or as close as it can get). It includes sharing files (and clipboard contents) between your two machines, as well as engaging the 3D acceleration that dramatically improves the Windows 10 desktop (and its applications).

Visit the following link to download the Tools. Remember to select the version for Windows (either ZIP or GZ version).

https://customerconnect.vmware.com/en/downloads/details?downloadGroup=VMTOOLS1135&productId=1073&rPId=74478

Once you select it, VMware will ask you to create a free account on their website. You can go on ahead and do so if you wish. However, if you don’t want to, then you cannot reach the download page. From my experience, VMware does not share your information, so I’d say it’s safe to do so.

When the file is downloaded, go ahead and uncompress it.

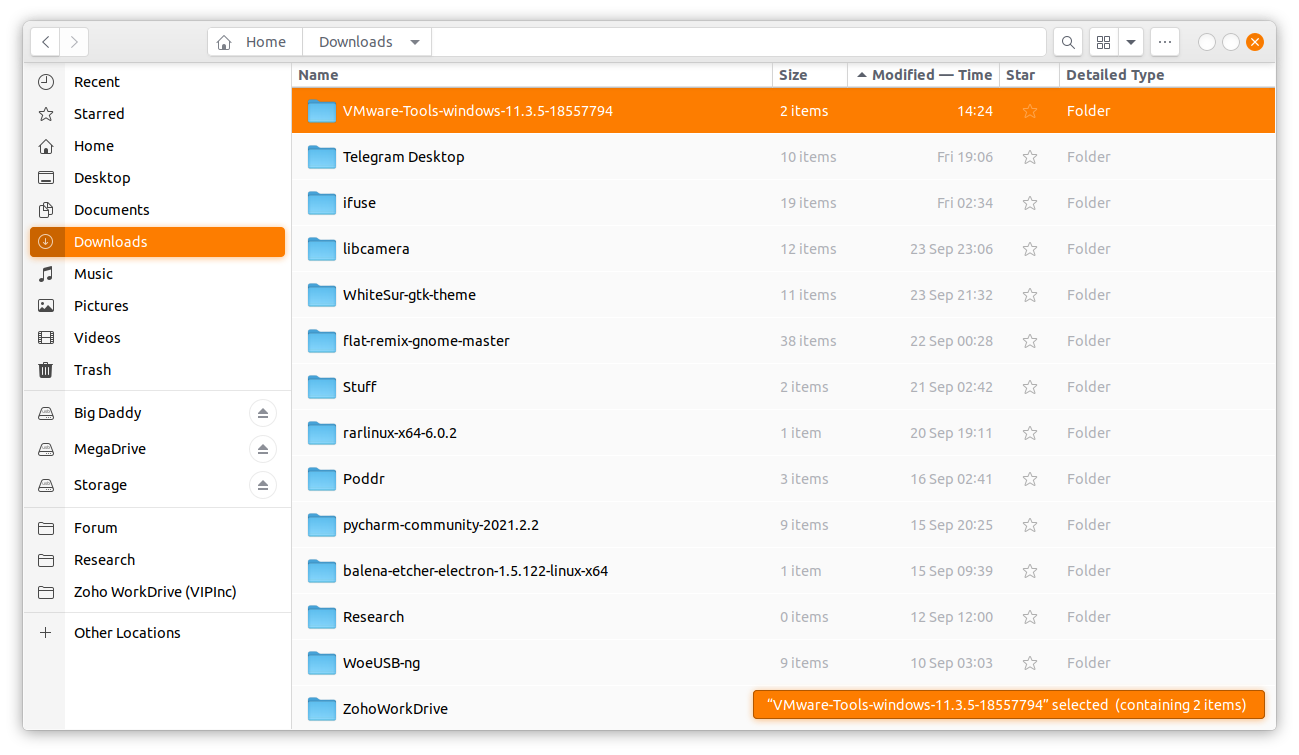
During that point, you might want to shut down your Windows OS inside the VMware Player and open the application (VMware Player) again. Select your Windows Virtual Machine and select to configure it. Then, go to the CD/DVD area and select the ISO file of the Tools, which you will find inside the folder you uncompressed earlier.

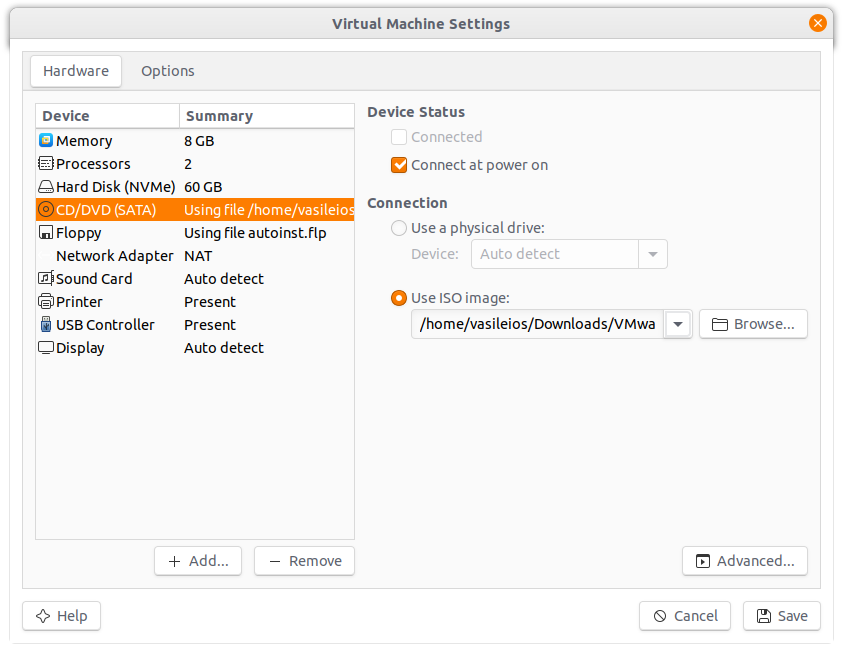
Once done, go ahead and save the changes. Start your Windows 10 Virtual Machine. When it loads up, and you log in, go ahead and open up the File Explorer. You will be able to see the VMware Tools as an inserted DVD.

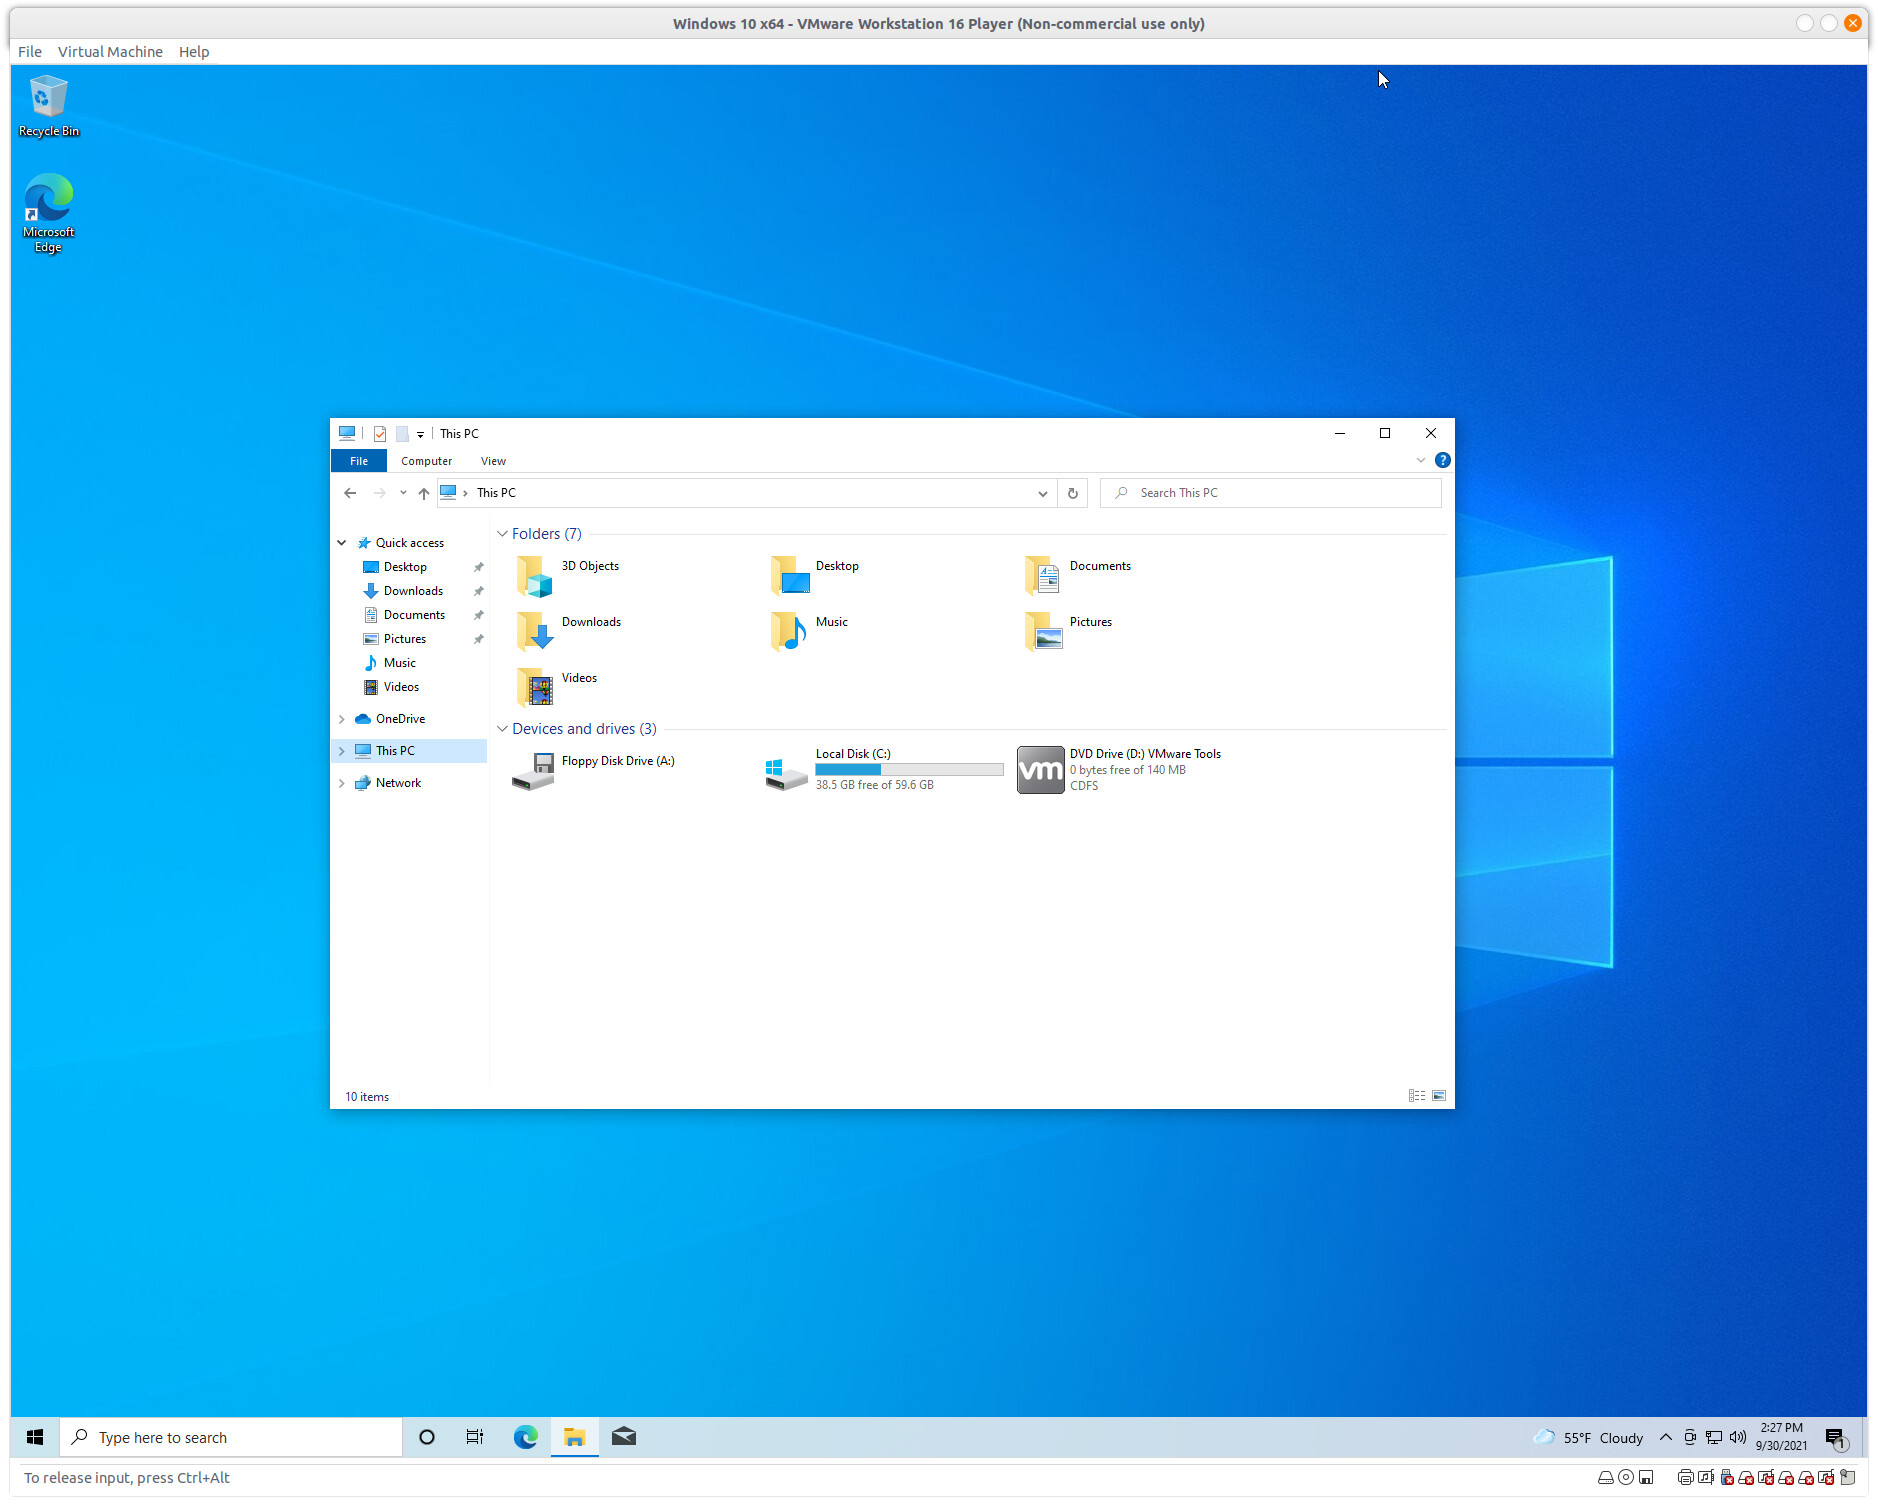
Please open it and run the 64bit installer. The installation process will be quick. Once done, reboot your Windows 10 Virtual Machine and enjoy!

Conclusion and Irony

And here we have Windows 10 inside of the Ubuntu Linux OS!

You can always turn it to full screen. Especially if you have the VMware Tools installed, the Windows resolution and desktop will automatically adapt to the size of your window (or full screen).

7 Likes

This is great info and I’m going to do it. Just in case … Other than that what are the reasons to continue to use Windows? Even within Linux? What suggestions are there to use this. Seriously, I always like new ideas. What am I missing?

1 Like

Hello @rmary!
Good questions. I’ll start with the simplest answer: accounting. TurboTax for businesses (S and C subchapter corporations) only runs off-line and on Windows. In some scenarios, it won’t even activate on Windows - because it requires not many programs to be installed (!).

Since I’ve worked in B2B my entire life, I’ve had companies send me proprietary files to an application that only works on Windows. One specific case was Cinema 4D. I had to download trial software, run it on the virtual machine, convert the file and pull it out with a different format.

Another rare case is that some motherboard manufacturers, due to the deals they have with Microsoft, tend to publish firmware updates in the form of EXE files. So, having Windows as an option, you can flash a USB to run the update. This situation, however, is starting to change, thankfully.

1 Like

This is great information that I can use later for my Microsoft Server Adminstration classes at school. By the time I take those classes next year, all of my desktops and laptops in the house will likely be running a Linux distro. I can use Virtual Box or VMware to assist me with playing around with and learning the Windows Server OS. :+1:

1 Like

That sounds great & it’s my pleasure @PatriotsQuest! :slight_smile:

1 Like

If you need a larger hard drive or an SSD hard drive. The most economical way to go about it is go to Wally World (Walmart) or any place that sells external hard drives (SATA HD connection). For example you can get an SSD 500 gb backup hard drive from Wally World for about 110$. Take it apart and replace your hard drive with the backup drive you purchased. There are some free software to image (copy your current HD to another HD such as Hires 15 in one Download Hiren's BootCD 15.2 for Windows free | Uptodown.com . It is bootable from cd or you can put the image on Ventoy (holds multiple images on one usb). Personally I have Hirens and many Linux Distro’s on one usb using Ventoy.

Disclaimer… if your system is older than a SATA HD connection the HD in stores will not fit you PC / Laptop.

@vasileios This will come in handy.

1 Like

And it’s quite fast too. :slight_smile:

Hello Everyone,

I figured out how to Activate your Windows installation once you have it up and running inside your linux machine.

IF it is a recent computer, it very likely has a UEFI/BIOS-bound Windows key. So, even if you installed linux right over the original Windows installation and formatted the drive(s), you can retrieve the Windoze Product Key from the BIOS. Here’s the command to get it:

sudo strings /sys/firmware/acpi/tables/MSDM | tail -1

Now, in your Windows VM, go to Settings, search for Activation | Select Change Product Key and enter the key from the results you got.

BOOM! Windows will be activated.

7 Likes

That is an awesome find! Seems that this is another reason why MS wanted to push their Secure Boot so hard.

1 Like

I’m currently set up with a dual boot system, but after reading this post, I’m inclined to give this a try so that I never have to boot into Windows and can access it whenever I need to (which hopefully will be less and less). Besides the fresh install of Win10 from the ISO, I found an article on HowToGeek to create a virtual machine file out of your existing Win10 install.
https://www.howtogeek.com/213145/how-to convert-a-physical-windows-or-linux-pc-to-a-virtual-machine/

I’m going to give that a try. There’s a lot of software that I have installed and for now don’t want to spend the time to find all the installers and go through the process of installing everything from scratch.
Maybe once I shift more of my work to be solely in Mint, I’ll consider doing a fresh install with just the minimal software that can only be run in Win10.

I’ll report back with my experience on creating a VM out of my current Win10 install.

On a side note, I recently got a new battery for my laptop and when I boot into Win10, it sometimes gives me a BSOD - Power State Failure. It has NEVER happened while in Mint! Score another one for Linux!

2 Likes

Got some progress on this front. I followed the HTG instructions and now have a 638Gb .vmdk of my original Win10 boot partition and the OS partition. Probably should have done a bit of housekeeping first to make it a bit smaller. :slight_smile: I did this using:

This is done from the Windows install. I chose my 5Tb backup drive to store the files.

Then I booted back into Mint and ran the VMware Player and selected the VM from the backup drive.
I get into the Player, but it says that the Virtual Machine is powered off or suspended. I’ve tried to restart it from the menu, but it ultimately crashes. I’ve got the vmware.log and tried to paste it in here, but didn’t seem to like that many lines in the post.

How can I load a log file to the post? It wouldn’t let me attach it.

Thanks,
Steve

2 Likes

Still stuck but found some info on the VMware communities that others are having issues with VMware Player 16.2.1.
@vasileios I tried to downgrade to a 15.x.x version but when I installed it, I got a message about having to uninstall the newer version first. I searched for how to do that and the choices were Synaptic package manager, but I don’t find VMware in the list. Then I tried using Terminal, but dpkg – list doesn’t have vmware either, but VMware Player is in my Administration menu.

Thoughts on what I’m missing (probably connections in my head…:smile: )

I’m going to try just creating a VM using the Win10 ISO as a start to make sure I can at least get one running with the version 16.2.1 that I have.

—More news:
OK. So I downloaded the Win10 ISO and created my VM from scratch following the process above.
Looks like 16.2.1 is a problem. I’m unable to get the machine to start. The first popup I get is that the VM needs 4 Gb of swap space and only 857 Mb is available. I have 16 Gb RAM and assigned 8 Gb to the VM. I don’t know where to go to fix this. Here’s the text in the popup:

VMware Player recommends 4 GB of system swap space for the set of currently running virtual machines. 857.6 MB of system swap space is available. For optimum performance increase the amount of system swap space, or configure all virtual machine memory to use reserved host RAM under Preferences.

After I click that popup away, the background screen just says " This VM is powered off or suspended" and then ultimately the Player crashes.

I’ll try to downgrade to the version 16.1 that you specify, if I can figure out how to uninstall the current version.

1 Like

More news 12/9/21
I live on the coast of South Carolina near Charleston. We have sea turtles that come ashore to nest. They lay their eggs in the sand dunes. There’s a Turtle Team that goes up and down the beach every day to look for turtle tracks to identify where the nests are and to mark them off to keep people away. The key to a successful hatchling is that it has to struggle to make its way out of its shell. That prepares it for the long journey back out to sea and to the mating grounds. Long story, yes, but I feel like that little just hatched turtle right now. I’ve struggled and am making some progress.

I’ve figured out how to remove the 16.2.1 version of VMware which seems to be problematic right now.

sudo vmware-installer --uninstall-product vmware-player

This gets rid of the bad 16.2.1.

Then I went back to the VMware download page to get the 16.1.2 version.

(https://customerconnect.vmware.com/en/downloads/details?downloadGroup=WKST-PLAYER-1612&productId=1039&rPId=77292)

I’ve installed that with the Terminal commands previously posted.
I set up my VM using the .vmdk I created from my Windows install.
It is now at least starting up, but ends up at just a grub screen:

I think my issue is that the Windows drive includes a boot partition that I had trouble with when it was the main drive and I was putting Mint on the second drive. Now that I switched it around, my dual boot setup is working fine, but probably just because it is ignoring that Windows boot partition.

I’ll probably have to restore it to its original position and then do a boot repair to fix the boot. I’ll also take the time to remove the majority of the data from that drive and shrink the partition down to probably a more manageable 60 Gb. Then I’ll use the VMware - vCenter Converter again to make a new .vmdk file for the VM. Hopefully that will work and then I’ll be able to dump the dual boot and just do Windows in VM.

1 Like

Hey @smarquis22!
My apologies for the delayed response. My time got decimated with the creation of a big LMS course on building a full-blown server (either on VPS or at home).

Funny you should mention your steps, as I was requested to build a course for this on video. That will be my next step. :slight_smile:

Yes, testing out the VM is the best course of action. Make sure that all the apps you need run well and then you can get rid of the MS spyware! I guess they did a booboo with their update. Though, they are quick to fix those. You could also play manually with the settings, as it gives you ample options to choose from. :slight_smile:

Cool. Creating a VM from the existing physical drive is definitely worthwhile for people who have a lot of programs installed that they might have trouble finding the installers for. That VMware tool worked fine for me.

Just wondering if you have any suggestions for my 2 issues.
If I assign 8Gb of RAM to the VM, I get that message that VM Player wants 4Gb of swap space, but only 857Mb is available. Is this talking about the actual Linux swap partition? Mine is 18 Gb. Should I make that bigger?
Second question: Are there any commands I can run in that Grub screen to get it to boot the OS? Or edit the boot files so that it boots. It says minimal BASH-like line editing is supported.

I did ls(hd0,1) and then did a bit more getting me to the boot partition folders:

Not sure where to go from here.
Thoughts?


5 minutes later…
The Turtle is making progress.

Found this on Stackexchange:

insmod part_gpt
insmod chain
set root=(hd0,gpt1)
chainloader /EFI/Microsoft/Boot/bootmgfw.efi
boot

Windows is booting now.
Next I’ll tackle the Swap issue.


43 minutes later…
Windows VM booted. Keyboard not working. Figured out the swap. Need to increase Win10 Paging file.
Trying to do that but hard without the keyboard.
The Turtle continues to struggle…

1 Like

Here’s what I got done yesterday:
The P2V VM at 638Gb was too slow and with the keyboard issue is was painful.
I moved almost 500 Gb of data off to another drive and then redid a P2V using vCenter Converter.
This one came in at 160 Gb. It was still slow as it was on a USB drive. I moved it into my Linux disk and now it is booting in a reasonable time.
I also figured out the keyboard issue. When you do a P2V, it grabs a lot of your drivers and sometimes there is a conflict. With laptops having a touchpad, there is a Synaptics remnant in the Registry that needs to be cleared out.
Here’s the site with the posts that helped with that resolution:
(Solved: Keyboard Not Working after VMWare Conversion - VMware Technology Network VMTN)
For the Swap issue, I’m still getting the same warning about needing 4Gb but only having 857Mb. I set up Windows to use 12 Gb-16Gb for its paging file, but that did not seem to help. I don’t see any options in the VMware program to manage that or where it is getting the 857Mb number from.
Four more things: (P.S. started at two!)

  1. In the VM, the Windows menu is transparent, so the options float on the desktop.
  2. Sound is not working
  3. There is weird flickering of the screen (or at least it was there yesterday…:slight_smile: )
  4. Windows and other Microsoft software want to be activated but fail to process on the VM, so will have to call them. Ugh!

Back to the struggle to break through the shell! This little turtle is getting tired!

1 Like

Good to see you are making progress! In some scenarios where there is a big hardware change, yes, there can be an issue to activate WindowZzz on a VM. I picked up a license especially for it (at around $20-$25) and used it specifically for VMs. Though one member discovered that the license is actually held in the UEFI file of WindowZzz’ boot loader. I haven’t tried that as I no longer boot into that OS.

I have all my keys as I used ProduKey on the Windows side to interrogate both the OS and the BIOS. Virus scans think that software is a PUP, but it’s fine. It’s a cool little program and free too.

So, of my 4 issues, 1,3 and 4 are tied together. The flickering and floating/transparent menu comes from a Personalization for Color as mentioned in this post of the VMware forums:

My issue is that it won’t let me change that setting until I re-activate Windows again. I’m going to wait a bit until I finalize my analysis of the programs I need on Windows only and will then shrink the Win10 partition to its minimal size, make a clone backup and then possibly go fully VM for Win10.

@vasileios BTW, learning more stuff along the way. Each little hiccup is a new rabbit hole!
I’ll document them so you can determine how to disseminate them in the forum. Maybe a Tips and Tricks thread. I’ve found that some of the VMware posts are very specific to the techie audience who actually manage VMs for a living. It’s nice when we come across stuff that is more geared to the home user.

2 Likes

I am running windows 10 in a VM in Linux Mint Mate but might install windows and run the Linux in side it as I have programs that won’t run in Linux. I just rebuilt my tower computer with a motherboard, cpu, and ram and the programs that came with the motherboard to watch what is going on with it I can’t install. I can’t update to windows 11 as it never had windows on it and it is a new motherboard.
I use an old HP laptop to run windows and the tower for Linux. I don’t want windows but will probably have to have it one way or another just to update the motherboard.
I hope the situation does change as it has and probably will when more people change from windows.

1 Like