There may come an instance where you may not be able to get a GUI app the creates bootable USB’s to install or function properly.
This tutorial will show you how to write a bootable USB from the CLI, Command Line Interface or more commonly known as the “terminal”.
The first obvious step is to download your desired distro, either via a browser, torrent client or using “wget” from the terminal. Save it to your “Downloads” folder.
With “wget” you will need to copy the download link, open a terminal cd Downloads type out wget and paste your link(typically CTRL+SHFT+V), hit ENTER and wait till it completes.
Go play a nice game of Sudoku while it downloads or watch a movie as it will take some time depending on your connection, the distro size etc. I myself hardly ever do “net installs” so I download the complete ISO.
Note: If you download the distro directly from the maintainers website, you typically do not need to “verify” the download using the MD5 Checksum, however it DOES happen on occassion:
In June 2017 Linux Mints website was hacked. Read below, also contains a tutorial for verifying the ISO(this works with ANY distro as ALL provide MD5 checksums. If a distro does not provide a MD5 DO NOT use it or use it at your own risk.
How to Verify a Linux ISO’s Checksum and Confirm It Hasn’t Been Tampered With
Once the download is complete, you should verify your ISO.
At this point your thumb drive to use should not be plugged in. Depending on the distro you downloaded a 4GB thumb drive may be sufficient, though I try to stick with 8GB which is sufficient for any distro.
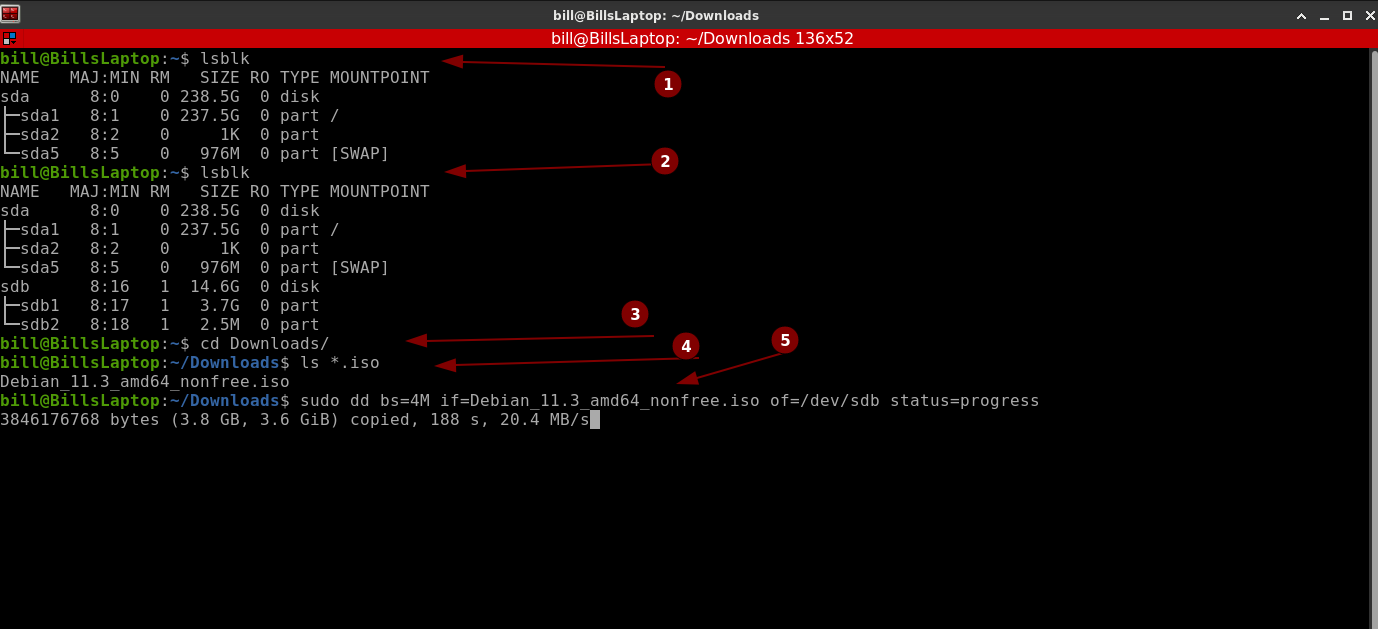
Open a terminal and run the command lsblk it should return something similar depending on the number of drives in your system:
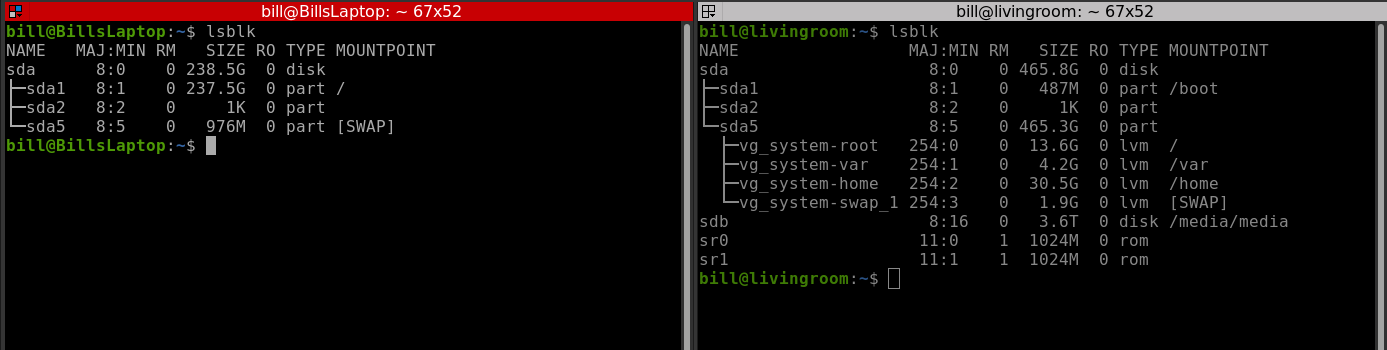
On the left is my laptop with only a single drive and no cdrom, the right is my desktop HTC/server with multiple drives(sd*#) and multiple cdroms(sr#). Asterisks for varying letters, “lb” or “hash” sign for varying numbers. When I connect a new drive I will run the lsblk command again to identify the new drive attached:
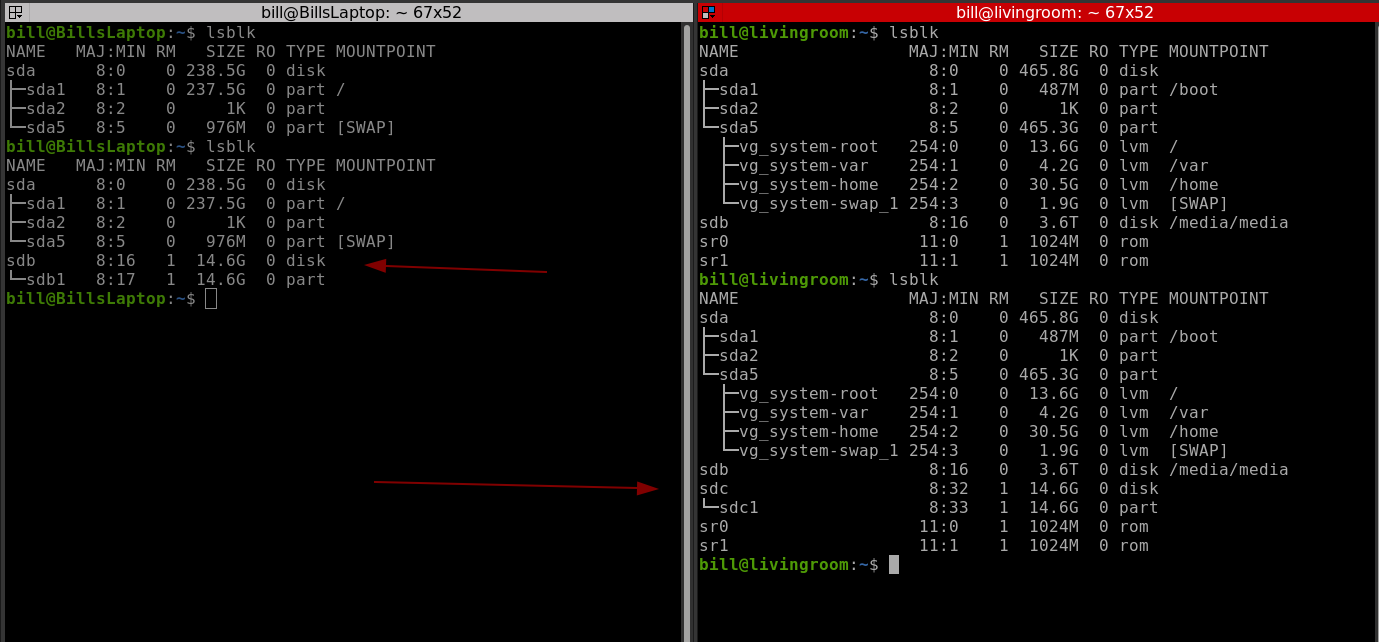
Again, the image shows 2 different systems with newly inserted drives, pay particular notice to the /dev/sd*. In this case, the laptop on left is sdb and the multi-drive setup is sdc as well as their “SIZE” and “MOUNTPOINT”. Clear indicator of the drive you’re looking for.
IF the “MOUNTPOINT” is populated with a path, double check that that is the drive you wish to use, ie. NOT your harddrive and not a USB with pertinent data you wish to retain as it will be wiped.
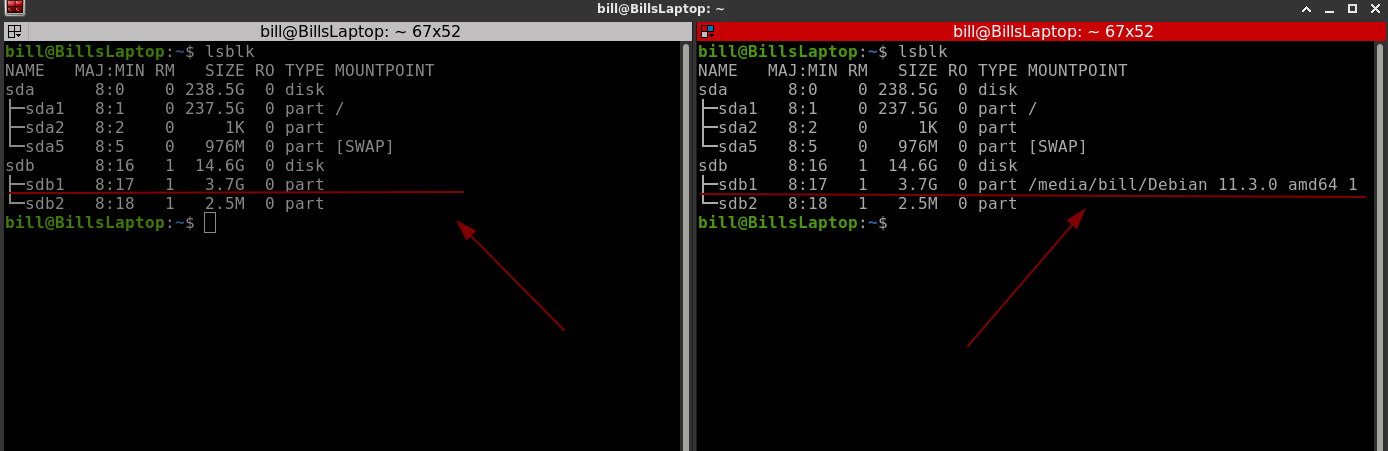
If you are certain that the drive is the one you want to use and it has automounted with a path you simply issue the command(in this particular case) sudo umount /dev/sdb1 and run lsblk again.

If you are paying attention, I have been swapping between to different 16GB USB thumb drives, one only contained sdb1 or sdc1(blank ones) and another with both sdb1 and sdb2. This drive is already setup to be bootable with a Debian 11 image but I’m just going to overwrite it with the same image for the process.
The command “dd” is affecionately referred to in the Linux community as “disk destroyer”, however, given the proper usage, it is highly efficient.
Utilizing what I have show you above to verify the drive to be written, the command is simple;
sudo dd bs=4M if=/path/to/file.iso of=/dev/sd* status=progress
In this scenario(rewriting my own current bootable USB:
sudo dd bs=4M if=Debian_11.3_amd64_nonfree.iso of=/dev/sdb status=progress
or
sudo dd bs=4M if=/home/bill/Downloads/Debian_11.3_amd64_nonfree.iso of=/dev/sdb status=progress
Now there is no need to “type” out the filename completely. When you get to the point of the name, simply type the first few characters, case sensitive and then press the TAB key, the shell should autocomplete the filename, in the case you have more then one similar files be sure to get the correct one by completing the next different character and then TAB again. Note the spaces in the command line:
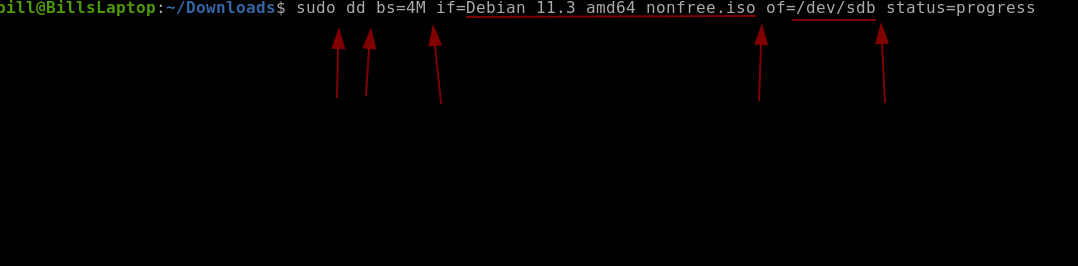
Note the spaces with arrows, underlined is your pertinent filename and dev path relative to your system.
Running

Completed
If you are unsure, dont be afraid to ask!
Any questions, feel free to contact me on this thread, in JP’s Technology Chat or Tech Garage Chat
I certainly hope this helps anyone that may have issues with Rufus, Balena Etcher or other bootable USB creator programs.