I looked closer at your screen shots of “Disks”, and you’ve got your 4 TB drive highlighted in the last one - with the path /dev/data/root. The 2TB drive is not mounted anywhere yet.
I just walked through the process of adding a new external disk to Linux Mint running on my Macbook Air.
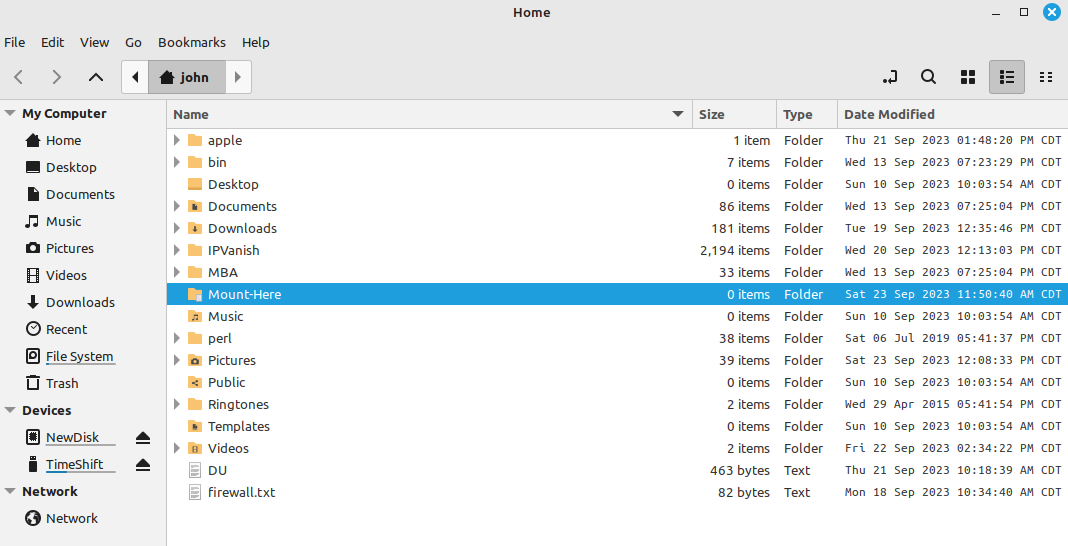
First - create a new folder in your Home - I created a directory (which will be the mount point for the new disk) named “Mount-Here”. I chose to mount it under my home directory because it’s simple.
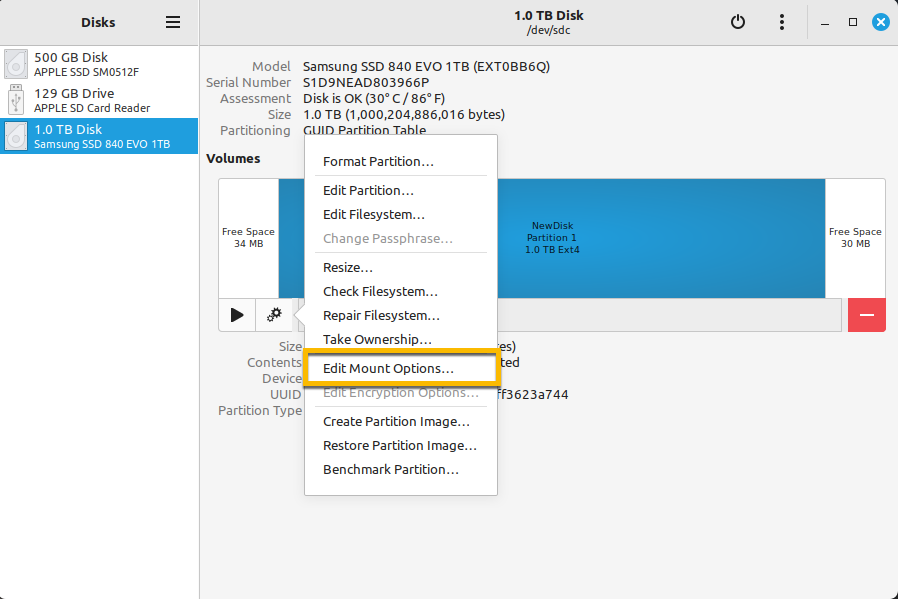
Next, bring up “Disks” and select your new disk. Then choose the “gear” icon under the highlighted section, from the menu presented select Edit Mount Options.
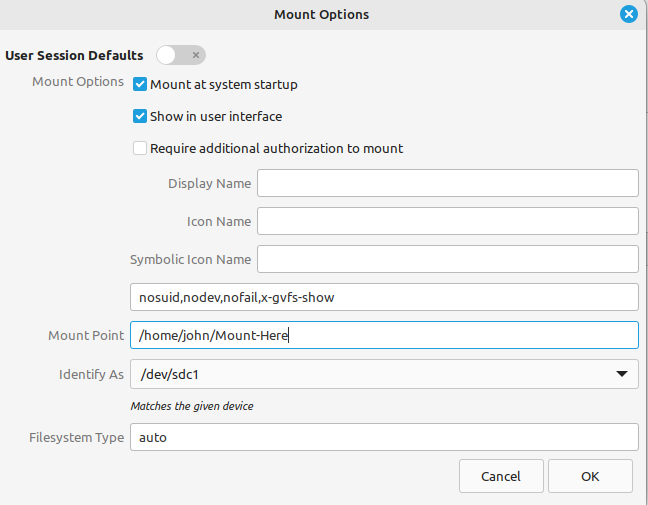
Apply settings in the Mount Options dialog to look similar to this. Deselect the “User Session Defaults”, select “Mount at system startup” and “Show in user interface”. For the Mount Point, provide the location where you’d like the new disk mounted - again mine is /home/john/Mount-Here. Then click in the “Identify as” box and choose what’s similar to what I’ve shown - by looking at your screenshots above I’m guessing it’ll be /dev/sda1. Next select “OK”
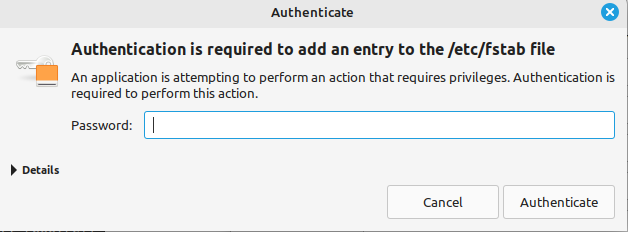
You will be prompted to enter your password so Linux can modify the file which is used at system boot time to mount the various file systems.
All that’s left is to mount the new disk. You can either reboot the system, or issue a command via a terminal. In my case I did so from a terminal via the command “sudo mount /home/john/Mount-Here”. I did a 'df -h" to show the current disk space used on the various mounted partitions, then issued the “mount” command, then ran “df -h” again which shows the new disk mounted at /home/john/Mount-Here.

I’m hoping this makes sense and is easy enough to follow.