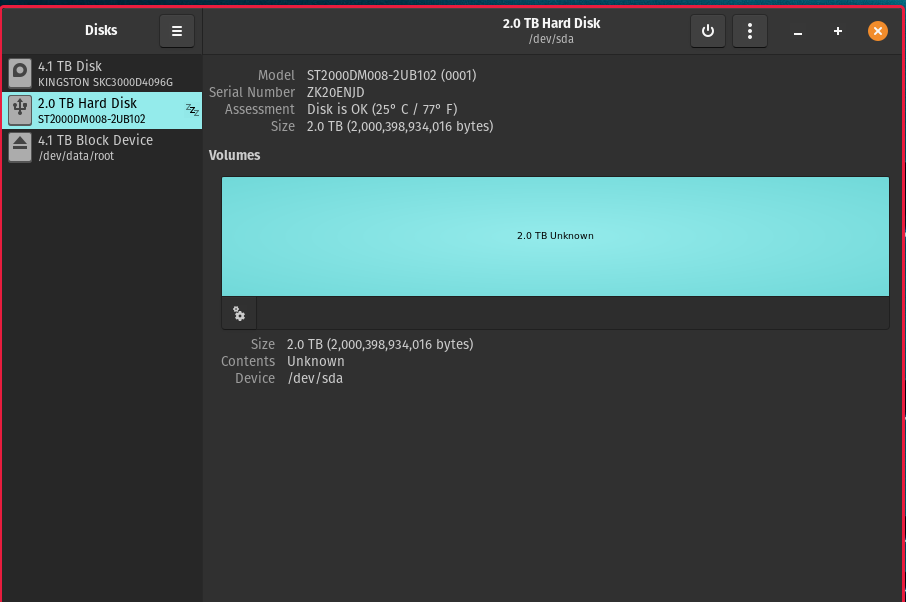
I have used a BlacX box with a number of external harddrives to store my files over the years. I have been able to access the data on these harddrives with my Linux Pop_OS with no problem. I purchased a Seagate HD and it would not be recognized so I returned it thinking it was defective. I purchased another one, 2TB, and it also was not recognized so I was pretty sure it was not formatted correctly. I have read instructions on this forum and formatted the HD using Discs. Apparently I did something wrong because it still doesn’t show up in my Files. When I find it in Discs it says “mounted at Filesystem Root.” How do I get it to live in my user section please? I am not good with terminal commands yet. I have included some screen shots.
I have some ideas.
First, confirm the file system format of your external hard drive. Open the “Disks” utility and select your external hard drive from the left-hand side panel. In the main window, look for the “Partition Type” or “File System” entry. It should indicate the file system format (e.g., NTFS, FAT32, exFAT). Note down the file system format.
Mount the hard drive in your user section: If the external hard drive is currently mounted at the Filesystem Root, try remounting it in your user section.
Open a terminal window.
Create a directory where you want to mount the external hard drive. For example, you can use the following command to create a directory named “external” in your user’s home directory:
Copy
mkdir ~/external
Next, you can try remounting the external hard drive to the directory you just created using the following command:
Copy
sudo mount -t <file_system_format> /dev/sdX1 ~/external
Replace <file_system_format> with the actual file system format of your external hard drive (e.g., ntfs, fat32) and /dev/sdX1 with the appropriate device identifier for your external hard drive. Be careful to select the correct device identifier to avoid accidentally modifying other drives.
After running the command, check if your external hard drive is accessible in your user section by opening the “Files” application and navigating to the “external” directory.
Automount the hard drive: If you want the external hard drive to be automatically mounted in your user section every time you start your computer, you can configure it to do so. Here’s how:
Open a terminal window.
Edit the /etc/fstab file using a text editor like Nano with the following command:
Copy
sudo nano /etc/fstab
At the end of the file, add a new line with the following information:
Copy
UUID= /home/<your_username>/external <file_system_format> defaults 0 0
Replace with the UUID of your external hard drive. To find the UUID, you can use the sudo blkid command. Replace <your_username> with your actual username, and <file_system_format> with the actual file system format of your external hard drive.
Save the changes (in Nano, press Ctrl+O, then Enter) and exit the text editor (in Nano, press Ctrl+X).
Restart your computer, and the external hard drive should be automatically mounted in your user section.
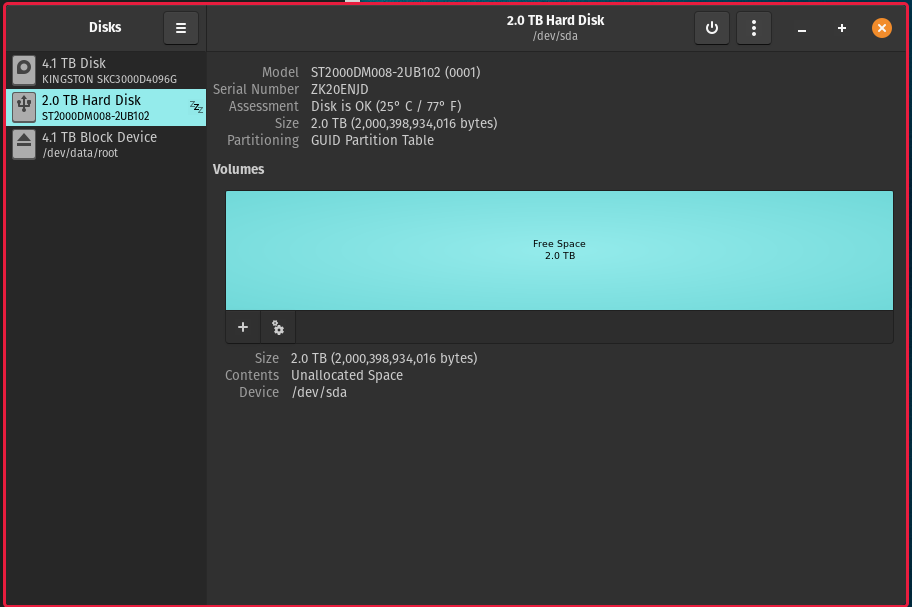
Thank you for your help. I immediately ran into a problem. Please see the screen shot from today. I had previously posted the wrong view on my initial post for the image I received after trying to format. All it says is “Free Space 2.0 TB”. If I look at another entry from the left hand side panel I see where I would normally find the information you refer to, such as Partition type. I also see it tells me where the contents are mounted. But I see non of this when I select this new external drive.
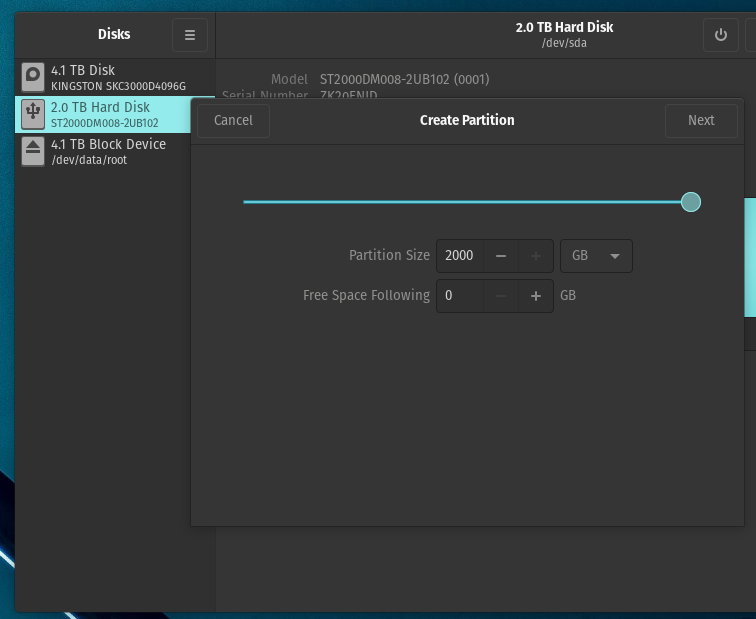
I can click on the “+” symbol and it will allow me to create a partition. See screenshot.
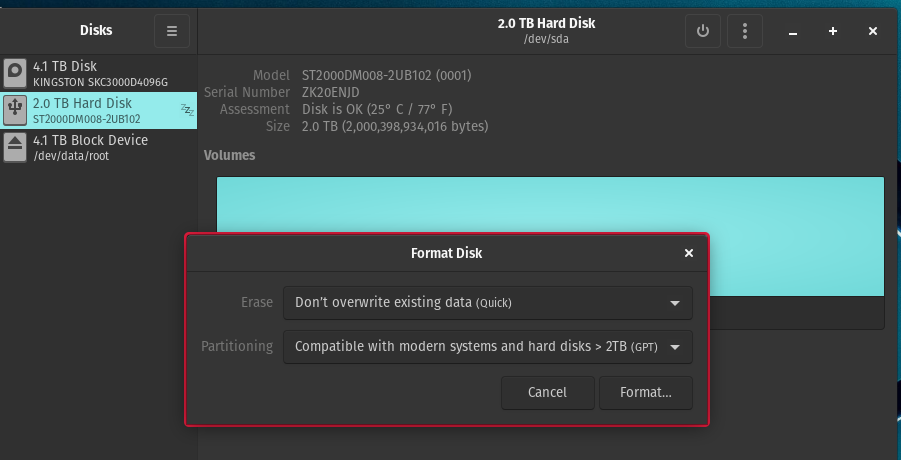
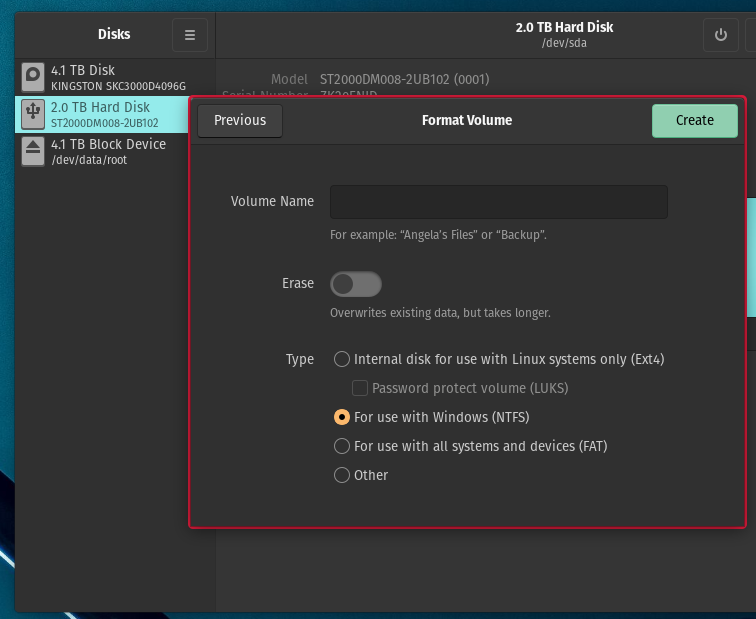
Then if I choose to create a partition of 1 GB and press Next I have the choices in the next screen shot. I did not proceed further.
Were you able to get your disk mounted? At the point you left off, I would select the EXT4 filesystem format.
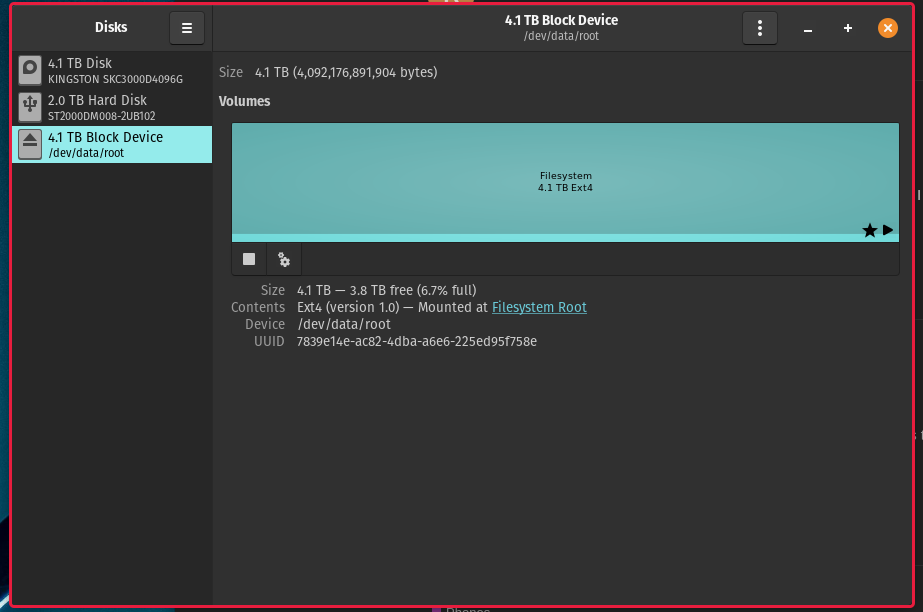
Thank you Narcosis for following up. I have included a screen shot. Apparently it is now an EXT 4 file system however it is mounted at Root. How do I get it under my user profile so I can back up my files please?
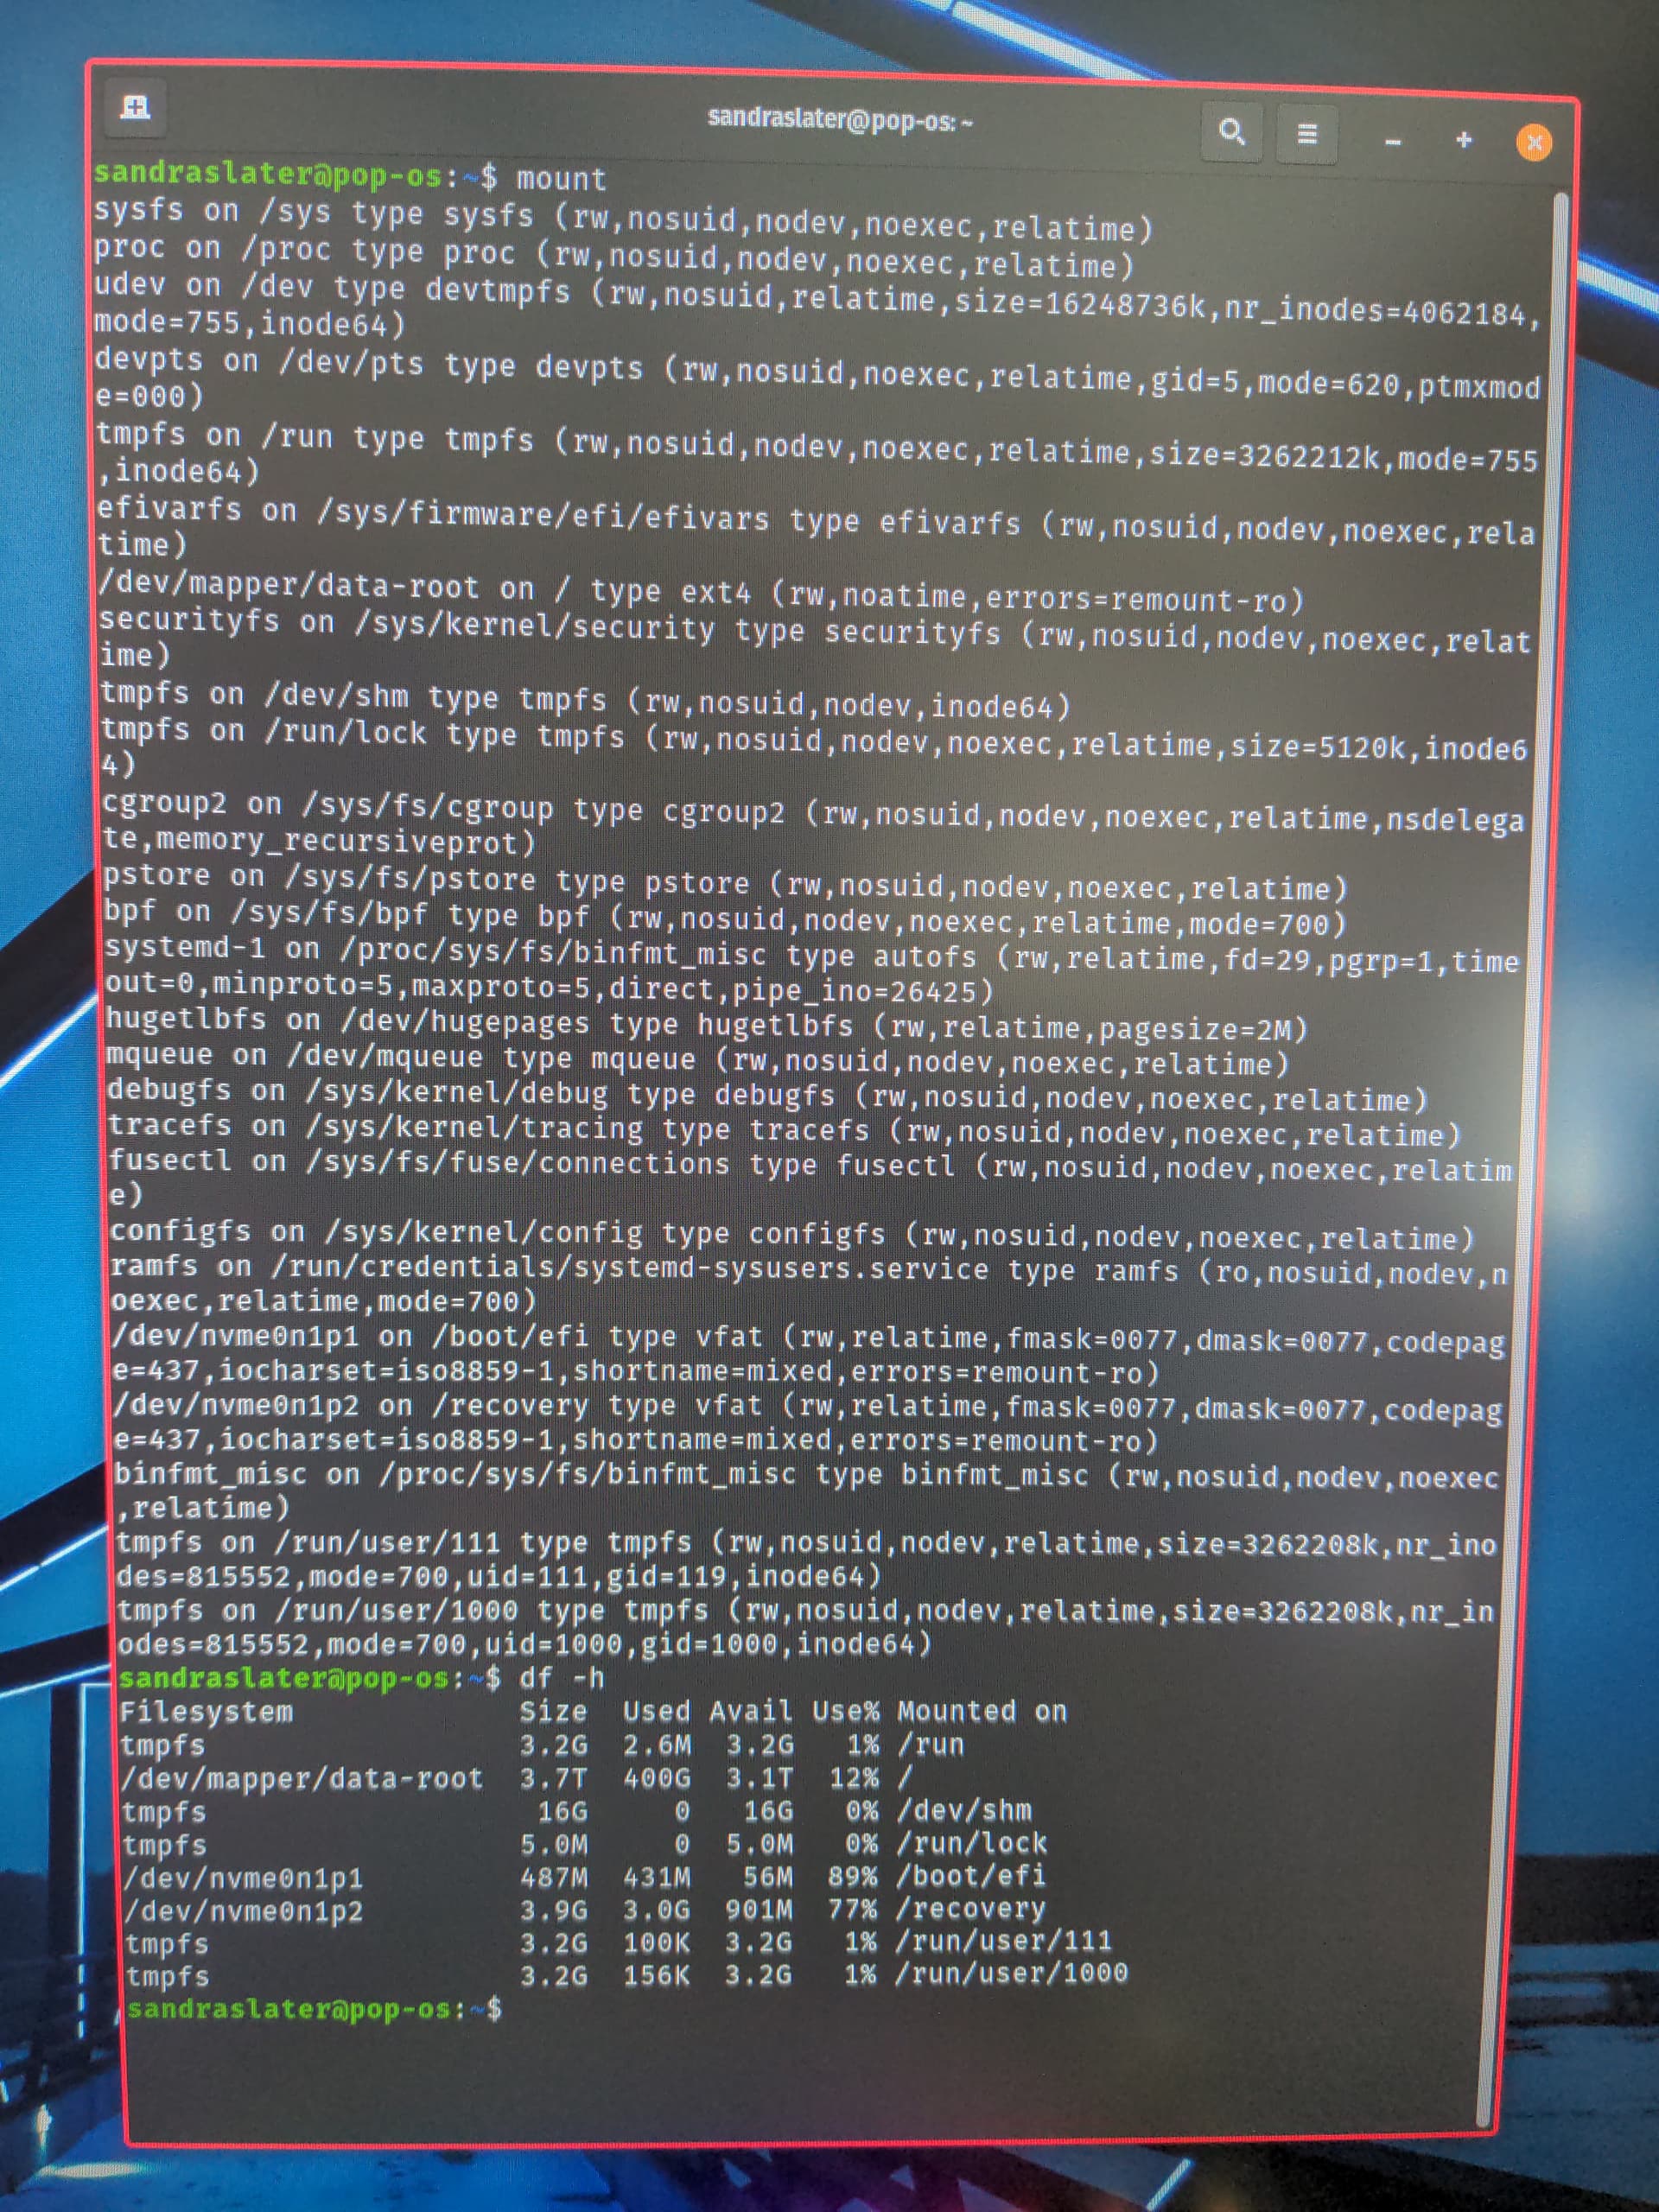
If you can, bring up a Terminal and type “mount”, then “df -h” and share a screen shot of the output of those 2 commands.
I hope you can read the output. Something is wrong with my desktop, the one that I have connected to the BlacX box and I can’t get on the internet. I entered the command and then took a photo with my phone.
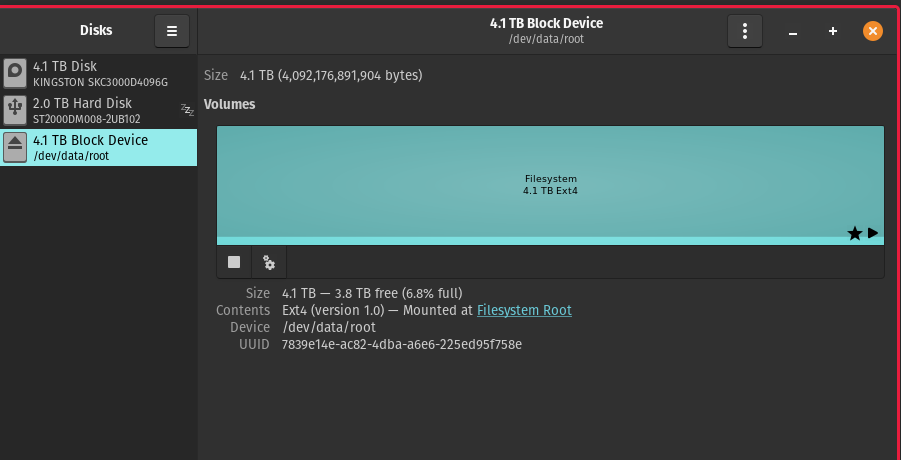
I looked closer at your screen shots of “Disks”, and you’ve got your 4 TB drive highlighted in the last one - with the path /dev/data/root. The 2TB drive is not mounted anywhere yet.
I just walked through the process of adding a new external disk to Linux Mint running on my Macbook Air.
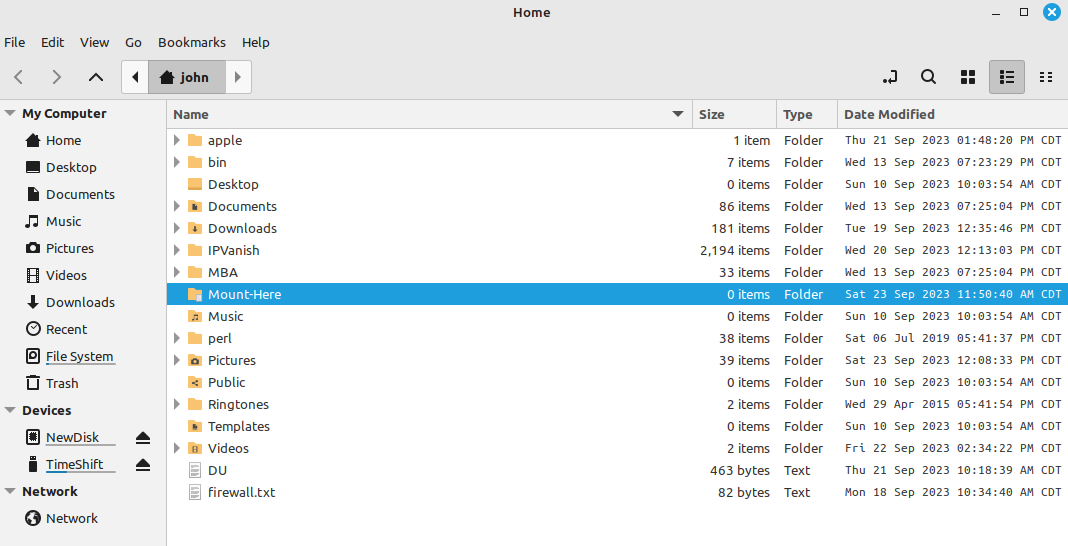
First - create a new folder in your Home - I created a directory (which will be the mount point for the new disk) named “Mount-Here”. I chose to mount it under my home directory because it’s simple.
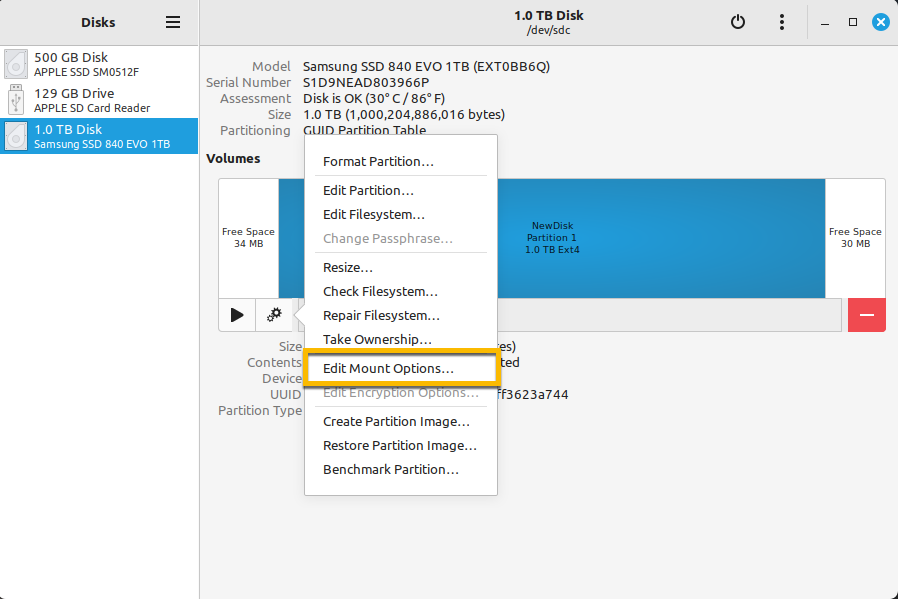
Next, bring up “Disks” and select your new disk. Then choose the “gear” icon under the highlighted section, from the menu presented select Edit Mount Options.
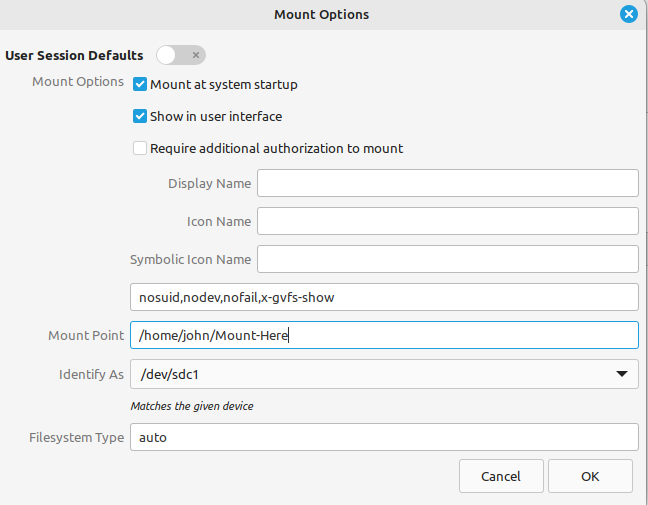
Apply settings in the Mount Options dialog to look similar to this. Deselect the “User Session Defaults”, select “Mount at system startup” and “Show in user interface”. For the Mount Point, provide the location where you’d like the new disk mounted - again mine is /home/john/Mount-Here. Then click in the “Identify as” box and choose what’s similar to what I’ve shown - by looking at your screenshots above I’m guessing it’ll be /dev/sda1. Next select “OK”
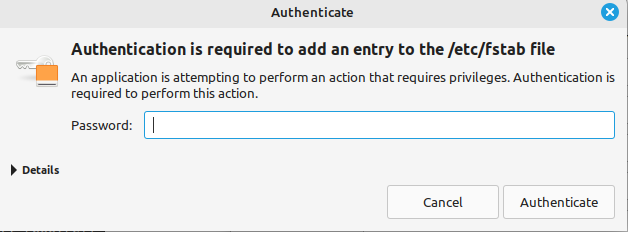
You will be prompted to enter your password so Linux can modify the file which is used at system boot time to mount the various file systems.
All that’s left is to mount the new disk. You can either reboot the system, or issue a command via a terminal. In my case I did so from a terminal via the command “sudo mount /home/john/Mount-Here”. I did a 'df -h" to show the current disk space used on the various mounted partitions, then issued the “mount” command, then ran “df -h” again which shows the new disk mounted at /home/john/Mount-Here.

I’m hoping this makes sense and is easy enough to follow.
Narcosis, I created my folder and I chose the gear but all of the options were in grey and were not clickable. I can choose the “+” symbol and it asks me to create the partition. I don’t understand partitions in the computer realm. Wouldn’t I want to use all 2TB? After I click next I have to choose Ext4 (Linux only) or FAT (all systems and devices). I only intent to use Linux however would I ever need to access this on any other device? I don’t think so but maybe there is something I don’t anticipate. I will wait for your reply. You are very kind to help a newby like me.
It sounds like your new drive hasn’t been formatted with a filesystem yet, do so with EXT4. Once that’s done, try the steps outlined above.
Once the disk is formatted with EXT4, you will be mounting the entire 2 TB at the mount point you created. If you end up with another Linux system, you will be able to plug the external drive into that new system & mount it there.
FAT is for Windows, run away run away! ![]()
Thank you for being patient with me. When I choose Format Disc I have three choices. Compatible with all systems and devices (MBR/DOS), Compatible with modern systems and hard disks > 2TB (GPT). and No partitioning (empty). I agree run away run away. Which do I choose please?
rasses2 - I sent you a PM.
As a follow up, rasses2 was able to create an EXT4 filesystem on the new drive and get it mounted. Using the Mount Options functionality of “Disks” an entry was added to /etc/fstab to ensure it’s mounted at boot time.
I am unsure but I think this will work for me. Sorry I missed this before opening a thread!