For anyone else who really wants to use NordVPN on Ubuntu (ie: you have months or year(s) of your sub left and don’t want to spend more money on something else); well see below what worked for me (after a few dozen hours and colourful language).
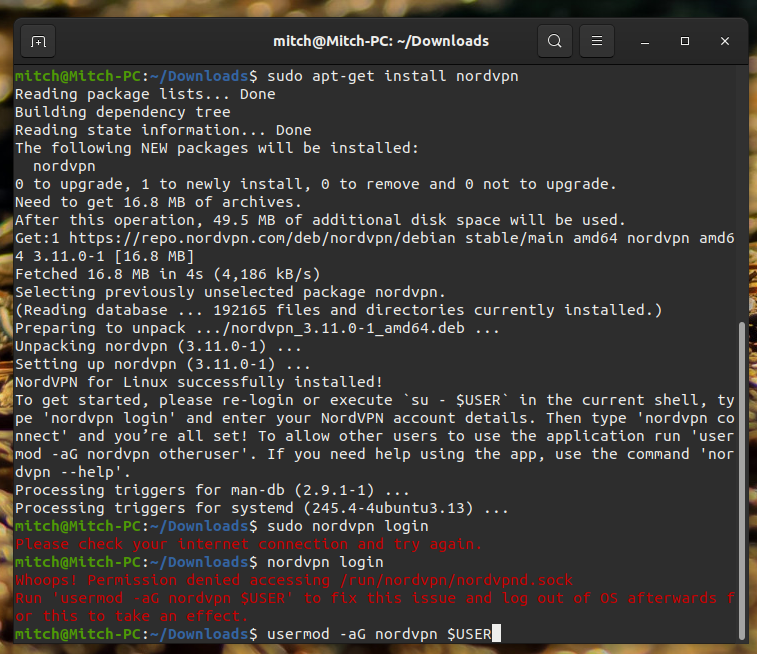
My issue was after installing the .deb file like many tutorials guide you to, upon logging in (“sudo nordvpn login”) I was getting a "Please check your internet connection and try again. error.
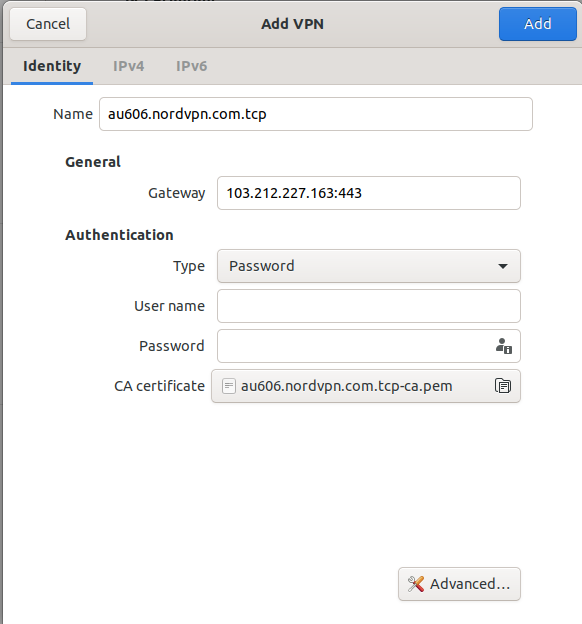
After completing the above, the only thing where is perhaps doesn’t explain enough is when you create a new VPN and import the config data, you use your NordVPN (username and p/w) in the fields.
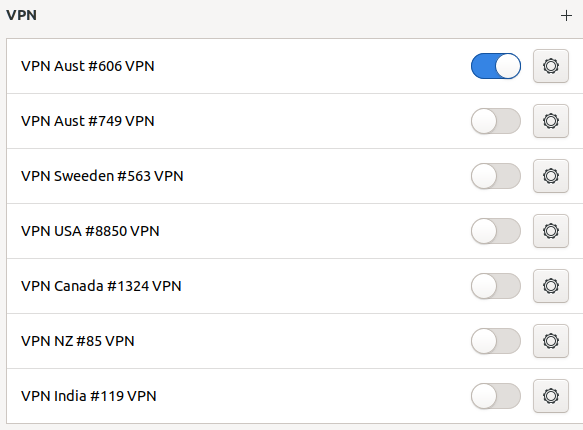
Would pay to download a few different server configs and load/save them so you can switch them around when you want. I’ve manually named them for easier reference.
If you were looking for a new VPN service for your new Ubuntu, then don’t get Nord. It doesn’t take too much a noob so see its clearly underdeveloped and sucks without a GUI. As above, I wanted to stick with it as good money was paid for the product and I still have 12 months of subscription left, and its been pretty awesome on Win10 and Android otherwise.
somebody the other day had posted, I wish I could find it, was say ing that you could script it to randomly pick from some predetetmined (chosen by you) servers. I wish I could remember more.
For NordVPN, there’s a faster route to get it always running.
nordvpn set autoconnect on
This option will automatically make it select your closest server and connect you the instant you log in. Also, you can find all the options in terminal (with examples) when you type in:
I was able to install NordVPN through my admin account and connect. However, using the terminal in my non-admin user account, after typing in “nordvpn connect”, I get:
rpc error: code = Unavailable desc = connection error: desc = “transport: Error while dialing dial unix /run/nordvpn/nordvpnd.sock: connect: permission denied”
Whoops! Permission denied accessing /run/nordvpn/nordvpnd.sock
Run ‘usermod -aG nordvpn $USER’ to fix this issue and log out of OS afterwards for this to take an effect.
I’m new to terminal commands, so I ran the usermod command with my user name for “$USER” and I get a directory of usermod options. What is it asking me to do? How do I fix the issue?
Hey @dotedus!
What you experienced is common, so no need to worry about it.
The app is basically asking you to place your user in the NordVPN group so that you can connect and disconnect without having to be root. Simply execute the following command:
Hey @dotedus!
I’ve never known Ubuntu to create a user without administrative option (Debian does). Unless you created a standard account? If so, then you will need to do grant sudo privileges to your user, otherwise you’ll need to enable the root account and that can be risky.
So, if you do have an administrative account, go there, open up a terminal and execute:
sudo usermod -aG sudo dodetus
Then log out and return to your original account and repeat the command from the previous post.
Yes, I probably set things up this way when I loaded Ubuntu. I was setting it up like I would my Mac, where I’d have an administrator account and another user account that was standard. I thought I read that that was safer because if you work in your admin account and it gets corrupted you must erase everything, whereas if your standard user account gets corrupted you just go into the admin account, grab the files from the standard account that you need, and erase the standard account. Is that a good idea on a Mac or unnecessary?
Anyway, I did the same thing on my Ubuntu machine. I made an admin level account and a standard user account. dotedus is the standard account. Should dotedus have admin privileges all the time, then? Is an admin account not needed in Linux?
Hey @dotedus!
You are doing it correctly - and this is true for both the Mac and the Windblowz machines.
On the Linux side, Debian follows this approach - as well as RedHat, though their super-user is generally root. That way one does not need to jump accounts to perform administrative actions.
In this scenario, you’d need to go to your other, administrative account, and execute:
sudo usermod -aG nordvpn dodetus
Then you can log out of that account and return to your standard one. That way you will be able to utilize NordVPN.
One note on the Linux accounts is that they do not become corrupt as it happens on WindBlowz and Macs. No matter what happens, you can always have access to your files without issue. It has a bit of a process, but I never lost a single byte.
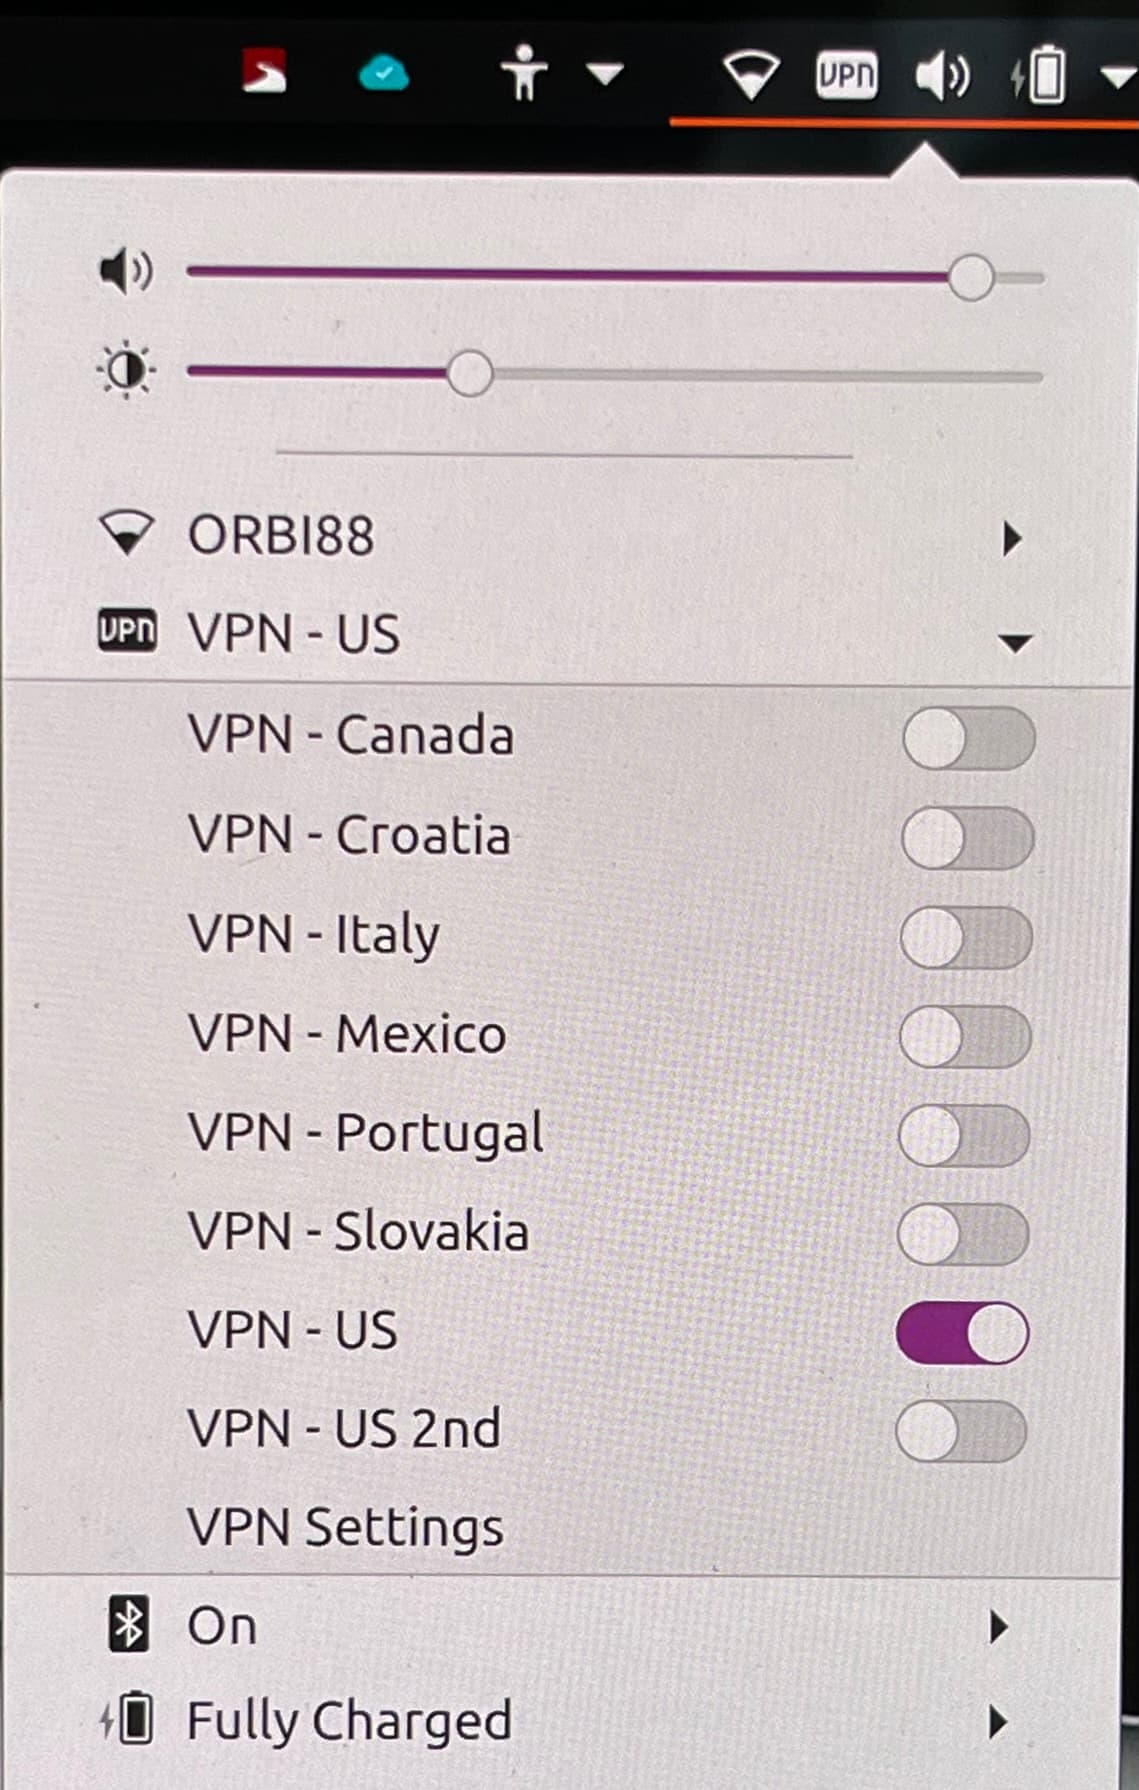
Hi @vasileios, I managed to get NordVPN set up and running on my computer and wanted to activate the “auto connect” feature described above. When I copy and paste the command into terminal I am getting "nordvpn: command not found. I will try and attach a pic so anyone can see exactly what I am entering and also getting back as a result. I will also attach a pic of the vpn’s I’ve downloaded. I have tested each one out and they all show an ip address from the host country, so I feel like I must have done something right??
If anyone has had a similar issue and come up with a solution, I’d love to hear how you resolved it.
From your images, it looks like you are on Ubuntu. Try using the Advance Network Manager… don’t remember if it comes with the install, try searching it.
If you don’t mind using command line, check this thread out:
(there are images of what you should see and how to enable auto-connect to VPN)
@Ai that worked and you are right, I am running ubuntu. I jumped to the thread you suggested and the vpn automatically connects…however, now my wifi doesn’t connect automatically. I restart the computer and have to manually connect to my network and once I do that the vpn auto-connects. I am not connected via an Ethernet cable, strictly wifi. After I manually connect, there is zero issue, everything works as it should. I have no idea what I managed to screw-up, but I did something. I did a quick search for similar issues and what I find refers to the same issue, but these people are all connected via an Ethernet cable. I will continue to search.
I encounter this sometimes on my laptop (wifi only) and if I waited a little I’d be connected again and on VPN… I think it broke because the wifi is working though the VPN did not connect so the result is no connection.
Mind you, I am a newbie, too… So, try and test is my usual way… I tested the following and it seems to help… (can’t tell you why it helps though…)
Go to Network Manager in Settings, check the make available for everyone box
Go where you put in username and password for the VPN
Click on the people icon and select “Store the password for all users” (this seems to get your wifi+VPN going before logging into Ubuntu)
Go down to “User key password” and click on the little icon, select “The password is not required”
(I remember doing this to stop it from asking me to authenticate with a password…)
If this doesn’t help and you find a solution, do make sure to come back and share… This seems like a popular issue…
@Ai …I am hesitant to say this, but I think I am set? I found a video on Youtube from Ricmedia titled "Reset Ethernet or Wi-Fi connection to defaults on Ubuntu 20.04 (which is what I am running) or 18.04
I followed his tutorial and basically deleted my wifi connection then re-established it. Once this was done I came back to your suggested link above “Open VPN turns off” and followed that again to set up auto connect for my my vpn.
After doing this I restarted and it worked perfect, no “Connection Failed” notification and all is well in my world…for the moment
I love the fact that as incompetent as I am that there are so many good people willing to lend a hand like @Ai@vasileios and a multitude of others. I am seriously grateful and am also certain that I will be a pest at some point in the, most likely, near future.
Hope you all have a good rest of your weekend,
Billy
Thank you for sharing your solution because one never knows when one needs this particular fix! BTW, incompetent in the Linux world just means “gathering more experience” :wink"