Hello @Suzanne!
Don’t be embarrassed! GitHub and SourceForge is basically an area where you can get the source code of an application and compile it for your system.
In order to begin, you will need to do the following installs, which are the minimal required:
sudo apt install git build-essential
This will install the GIT command, which can pull the code from these source code repositories and the Build Essential will install a set of compilers.
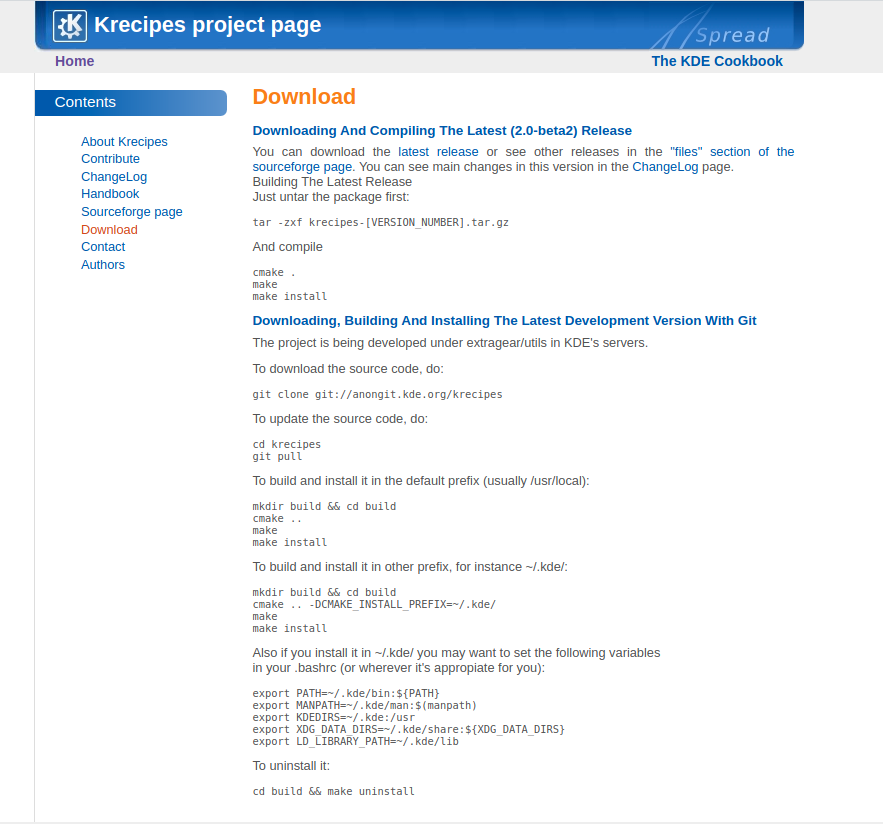
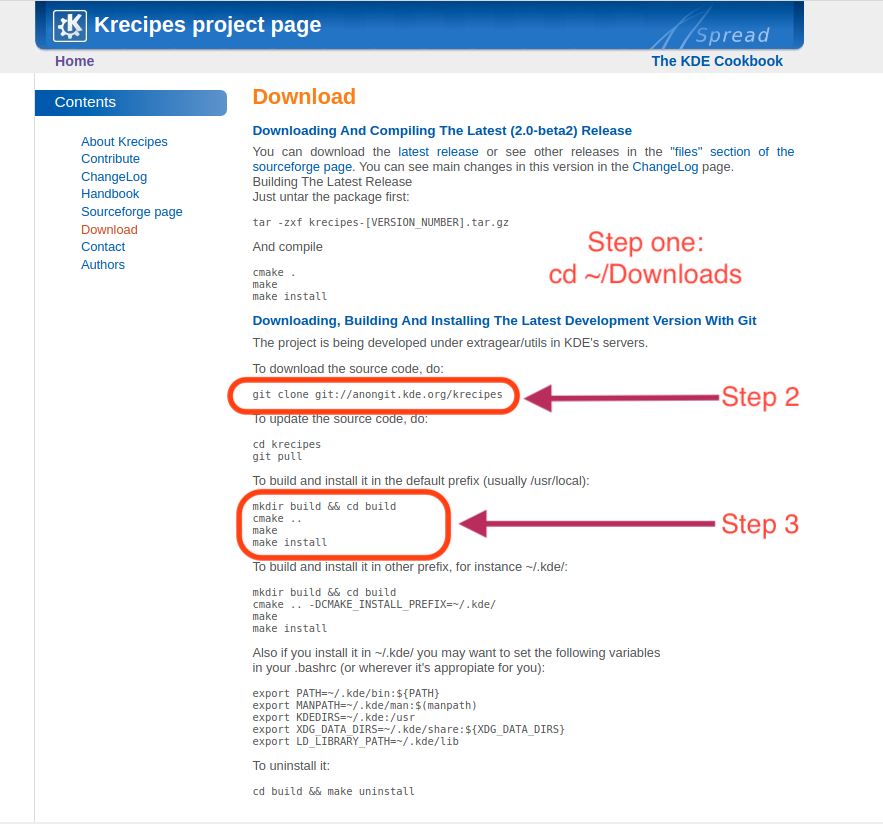
From there on, you can follow the instructions. However, for easier management, I would recommend entering the Terminal and starting with:
cd ~/Downloads
So that all your code “pulls” and “clones” (clone = initial download, pull = source code update), are in a folder that you now it’s a downloaded folder.
When you go into these folders, some of them may have different requirements, called dependencies. Normally, the README.md file will include the instructions. If not, they should be either on the page or via a link on the respective page, just as you posted above.
Usually, the process includes a “clone” command, then entering the folder you downloaded (usually the name of the GIT download), and then it’s generally about three steps (though this may vary):
- Configure (basically sets the pre-requisites to inform the compilers of the type of your system)
- Make - which compiles the source code into actual machine code (executables and libraries), and
- Make-Install, which goes after a sudo command - and installs the application in your system.
The trickiest are the first two, especially the second. If you keep an eye on the errors that may appear, they’re usually solved by looking for the missing dependency or app.
To find a missing app, you can type in:
apt search name_of_app
If you can’t find it, chances are it’s part of a bigger software package. In that scenario, you can do a:
sudo apt install apt-file
sudo apt update
This will create a database of all the files that software packages include. With this you can search to find which APT package has the file/library you need by typing:
sudo apt-file search name_of_file
It will come up with a list (sometimes rather big) showing you which packages hold the necessary file(s). Then you can select the specified package and install it via:
sudo apt install name_of_package
And then run the configure or the make command again. At some point, it will come to a full success and you can then install your desired software.
Keep in mind, that’s the generic approach. Some applications may have already pre-compiled files called “binaries.” So, if you find your desired binary in a list, select and download the one that has the .deb extension. A double click on the downloaded file will initiate the installation then for you.
I hope this gives you some direction.